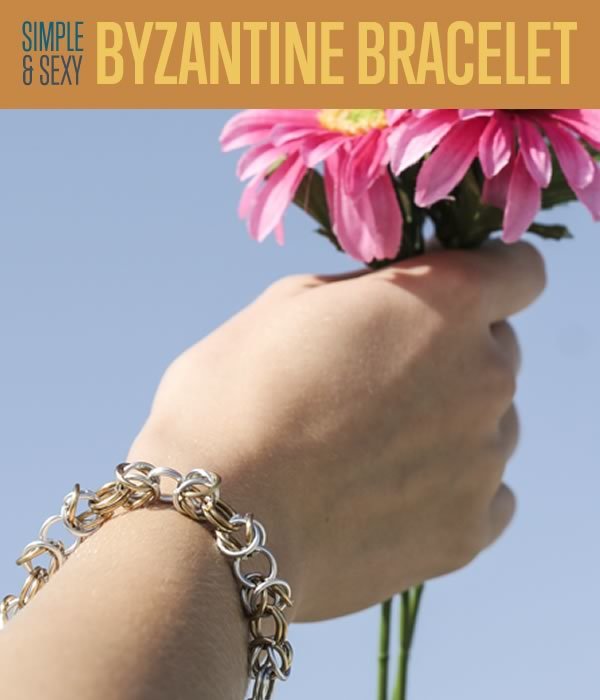
Did you ever wonder how to create beautiful metal stamped cuffs at home? There are tons of cool and creative things you can make using metal stamping techniques. Check out our step by step tutorial on how to create this custom metal stamped cuff.
Things you’ll need:
- Ruler
- Metal Stamps
- Fine Point Permanent Marker
- Blank Aluminum Cuff
- Stamping Block
- Masking Tape
- Rubber Mallet
- Chasing Hammer
- Rubbing Alcohol
- Paper Towel or Wet Tissue
- Dumbell
Step 1
Use your stamping block as a base for the bracelet blank and secure the blank above the block with masking tape. It’s recommended to use 2-3 layers of tape for extra security.
Step 2
Take a ruler and make tick marks to find the center of your blank cuff with the ultra fine marker. Feel free to also mark a central point on the blank cuff. This will help you figure out the letter spacing of your decided phrase and will also be a guide to keep your letters in a straight line.
Step 3
At the middle point of the cuff, begin to hammer down the stamp that is the center-most letter of your phrase. If you’re searching for a stream-lined look, you may line up the stamp at the ridge of the tape. This will especially help you mark the letters in a straight line. When you strike with the hammer, make sure the stamp is facing the right way, totally vertical and level. Be aware that one firm, solid strike should be enough.
Step 4
Working from the center out, begin to spell out the rest of the word and repeat the process with the remaining letters. You will have to move the aluminum cuff and re-tape it to the metal block just as you did at the beginning of the project.
Here’s a few tips to keep in mind before we proceed:
It’s good to have a practice round — practice makes perfect!
If you hesitate when striking, you risk a double imprint. The result: a “ghostly letter look.”
If you are stamping in lower-case letters, it may be helpful to stamp in the descenders (q, y, p, g) first. This way, you can use these letters as a guideline to mark the rest of the letters appropriately.
Step 5
If you would like your letters to stand out, you may use your permanent marker to fill them in and add some contrast to the cuff. Dampen your paper towel with a bit of rubbing alcohol and wipe off the excess ink from the cuff. If you use a cotton ball, you risk erasing the ink from the creases of your letters.
Step 6
Now for the shaping of the bracelet! Be wary of how you do it, trying to bend the cuff around your forearm just wont cut it. So, follow the second photo as an example of how you should shape your cuff. With your rubber mallet, begin to round out the flattened cuff between both ends of the dumbell. This should only require a few strikes
Step 7
Feel free to stamp in an extra phrase on the interior of the cuff. Maybe a little reminder from you for your eyes only.