Salvaged Window DIY Coffee Table | Unique Coffee Tables
You are here: Home / Create and Decorate / Salvaged Window DIY Coffee Table | Unique Coffee Tables

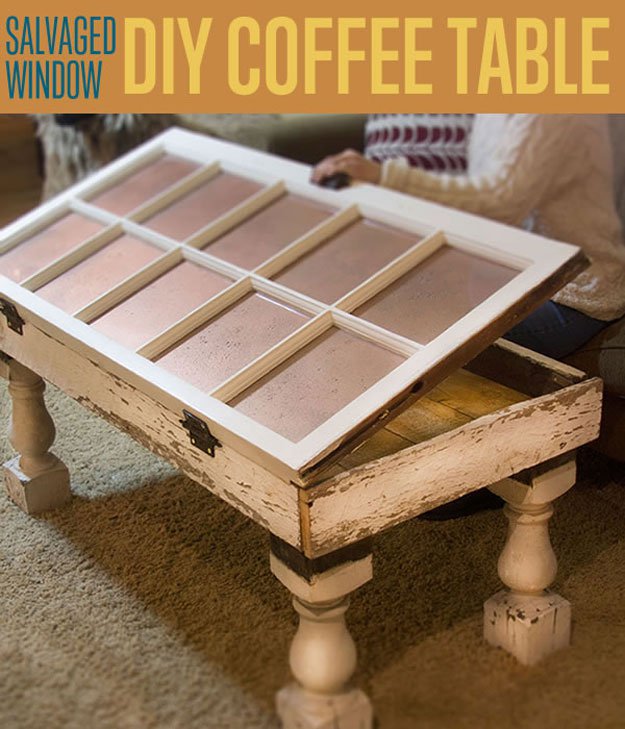
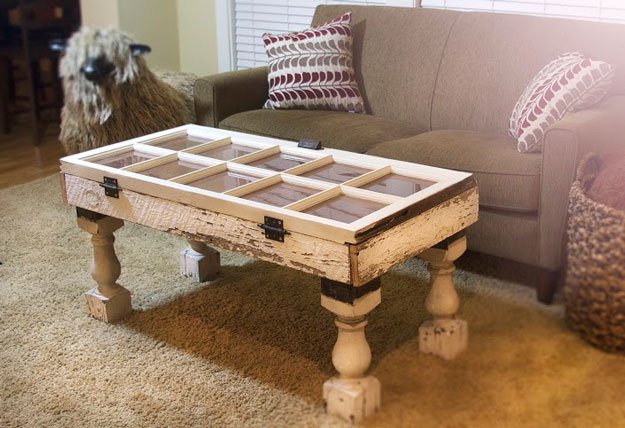
Do you want to build a conversation piece for your living room that is alive with back-story and rich character? This charming coffee table is a great project for any living room! Warm, cozy, and full of great storage, this rustic coffee will look fantastic in your space, surrounded by family and friends.
Supplies:
Architectural Salvage Store:
- Architectural Salvage Window
- Old Hinges
- Old Drawer Pull
- Old Pedestal or Spindle Feet (4)
- Old Wood Planks (measure around the perimeter of the window – that measurement is how many linear feet of old plank wood that you’ll need)
Hardware Store:
- Cheap Wood Planks (really cheap – I got these 1/2 in. x 4 in. x 6 ft. boards for about $1.60 each. Can’t beat that! Get enough of these boards to chop into strips and completely cover an area as big as the window that you purchased (these boards will form the bottom of the coffee table storage base).
- Screws, lots of them! A box of ½”, 1”, and 2” screws should have you covered.
- ”L” brackets (16 brackets with accompanying hardware)
- Metallic Copper Spray Paint
- Spray Bottle with Water
Tools from Around the Craft Room & Garage:
- Power Chop Saw
- Painter’s Tape
- Sandpaper
- Dropcloth
- Power Drill
Step 1
We’re going to start by working with the old planks of barn wood from the architectural salvage store. We need to make a base for the window, so that we can create storage inside of the coffee table. Let’s start with that wooden box base! Use a chop saw to cut your barn wood planks down to size. They should form a box that is exactly the same dimensions as your window. See the Step 1 photo for the layout (the window is not attached – that comes later – it is simply sitting on the box-base for reference in the Step 1 photo). The dimensions will vary based on what window you purchased, but the layout is quite simple. Just measure twice before you chop!
Step 2
Once you have confirmed that your planks are all cut to size, and you’ve laid them out in a box shape, attach them together in the corners with “L” brackets. I used two brackets in each corner, for increased stability.
Step 3
Using your cheap, 1” wood planks for the hardware store, we’re going to create the bottom of the storage base for the coffee table. Measure the INSIDE of the barn wood box that you created in Steps 1 and 2. That’s the area we need to cover with this thin wood.
Use your chop saw to cut strips of wood that, when assembled together as in the Step 3 photo, will perfectly fit into the barn wood box (see the photo for Step 3).
Slip them into the box to confirm that they will all fit – and make sure that they can slid down past the raised “L” brackets!
Once you have confirmed that they will all fit into the base of the box, assemble them on the floor and strap them together using three of your scrap pieces of wood, cut to size. I simply used ¾ in. screws to connect the boards together. And the base of your box is now ready for installation!
Step 4
We’re going to use more “L” brackets to secure the base of our storage box. Using 6-8 “L” brackets around the perimeter of the inside of the box, secure the “floor” of the box to the inside (see the Step 4 photo for a closer look). The left side of the Step 4 photo shows the “L” bracket from the BOTTOM of the box, once I was completely finished installing it – I flipped it over for a closer view.
Step 5
Time to install the legs! Line them up, making sure that they are flush with the ground and straight up and down.
Use a power drill and appropriately long screws to screw the legs to the base of the coffee table. I used 4 screws for each leg, and I arranged them in a box pattern in the corners. The end result was very sturdy!
Step 6
Now let’s work on the window glass for the top of the coffee table! I didn’t want clear glass in the window for the surface of my coffee table, because I don’t want to see all of the remotes, Xbox controllers, dog treats, socks, and random things that will inevitably get tossed inside.
I adore the look of copper mercury glass, so that’s what I decided to go with. Here’s how:
- Flip your window so that the BOTTOM of the window (the side that will face down into the coffee table storage box) is facing the ceiling. We are going to be painting this underside.
- Use painter’s tape to mask all of the wood areas of your frame.
- Use a copper metallic spray paint, and spray the glass window panes.
- Immediately after you’re done spray painting, take your spray bottle of water (turned onto the mist setting, NOT stream), and spritz the wet metallic paint all over (see the photo for Step 6 for a closer look).
Easy as that! When the paint dries and the water evaporates, you’ll be left with an absolutely gorgeous, mottled coat of copper that looks absolutely radiant from the top of the glass.
Step 7
Attach your window to the top of the table using the vintage hinges that you purchased from the architectural salvage store. I’d recommend using black screws for dark old hardware. Since I didn’t have any on hand, and I used gold and silver screws, I think I’ll whip out some brownish/black paint and darken those screw heads in the hinges so that they look old.
After you’ve attached the hinges, attach the vintage drawer pull to the other side of the window. It creates a great easy-lift handle for the storage space beneath.
And, you’re done! Polish up that glass with some Windex and enjoy your luxuriously rustic coffee table!

Did you enjoy our DIY coffee table? Let us know in the comments section below what your thoughts are on this repurposed idea. Do you have any other upcycling ideas you’d like to share? Share it with us and we’ll give it a try. We love doing cool DIY projects by making craft projects, home decor projects, upcycling ideas, recipes, tutorials and anything you can do yourself. That’s why we created this site, we want people to be more in touch with their creative side and realize that there’s a lot of things that they can do themselves. We’d love to hear from you and create a community of DIY enthusiasts where any project is just a click away. Stay connected with us on Facebook, Twitter, Pinterest and Instagram!
Do you want more DIY furniture to work on? Check more of our previous posts:
Golden Tree Stump End Table | How to Build a Table
DIY Bookcase Transformation | Furniture Rehab
How To Make A Table From A Repurposed Army Ammo Crate
I’m Manas Ranjan Sahoo: Founder of “Webtirety Software”. I’m a Full-time Software Professional and an aspiring entrepreneur, dedicated to growing this platform as large as possible. I love to Write Blogs on Software, Mobile applications, Web Technology, eCommerce, SEO, and about My experience with Life.


