How To Make A Butterfly Shadow Box
Paper Butterfly Shadowbox
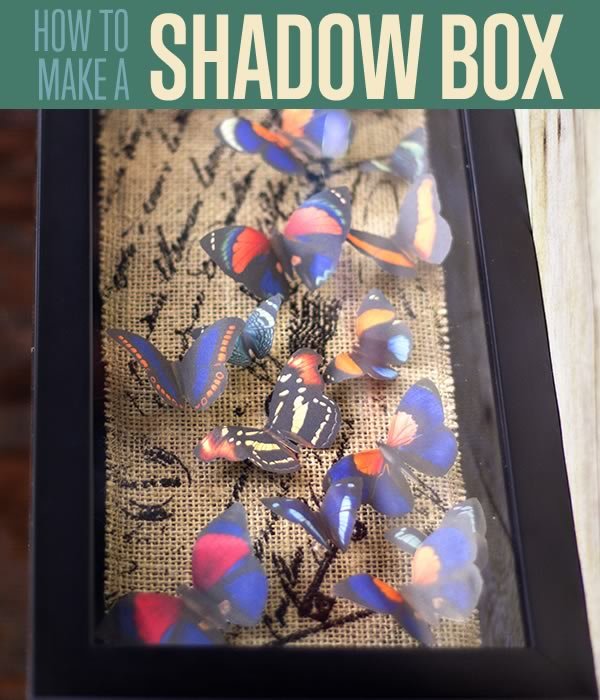
Create a breathtaking array of realistic butterflies in a shadowbox without harming any butterflies! This lifelike display of fluttering beauties will look lovely in any room of the house. Here are a few simple steps to making the shadow box of your dreams! Visit your local craft store to pick up all of the supplies you will need. Are you ready to take steps toward your new home decor project? Let’s get started!
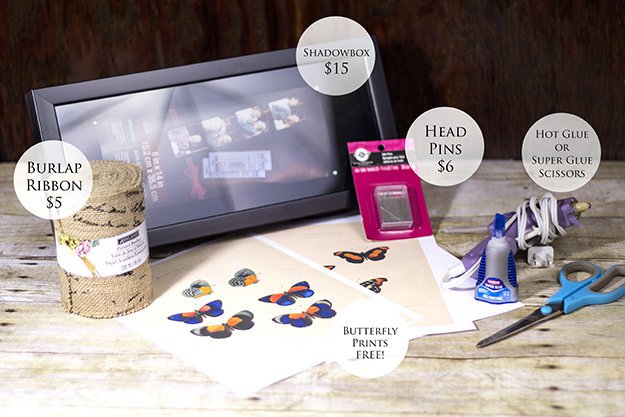
Supplies:
- Shadowbox. I found mine at Michael’s crafts, but you can also find them on Amazon.com, or even thrift stores.
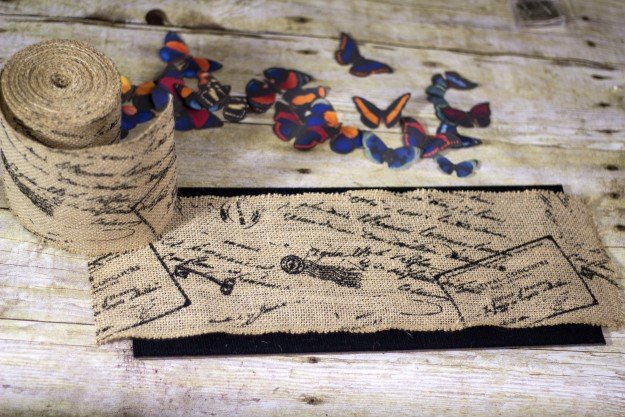
- Wide, printed burlap ribbon from Michael’s Crafts. This wide burlap ribbon will serve as the rustic, fibrous background for our shadowbox. Check the ribbon aisle, and also the specialty dried flower aisle.
- Tiny head pins – these are very easy to find. Any local craft store or fabric store will have them.
- Pages of printed butterfly images. One of the most exciting finds I’ve ever made for free “printables” is the Biodiversity Heritage Library’s online collection of high resolution, vintage art (https://www.flickr.com/photos/biodivlibrary/sets/). It’s wonderful, and has hundreds of images from birds, to butterflies, to botanicals, to maps. I adore it!
- General supplies – hot glue gun (or super glue if you don’t have a hot glue gun), and scissors.
They have many pages of butterflies that you can download and print for free (you just can’t sell them, for copyright reasons), and here are my three favorite butterfly pages:
Butterfly Page 1: (HERE).
Butterfly Page 2: (HERE).
Butterfly Page 3: (HERE).
Step 1.
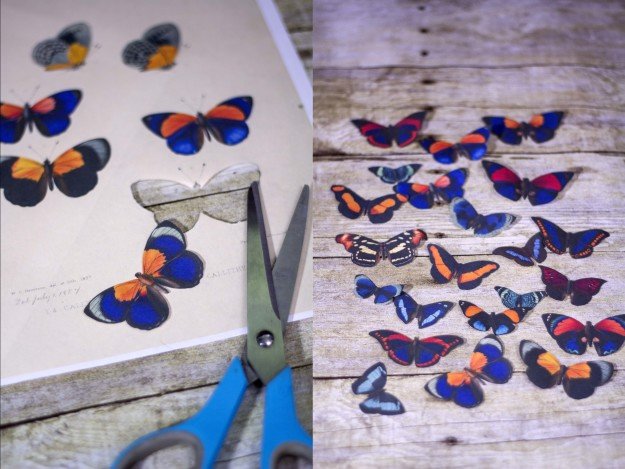
Once you’ve perused the hundreds of butterfly images at the Biodiversity Heritage Library links above, find the butterflies that you like, and print them out on regular computer paper. If you have a smaller shadowbox than mine, you may want to print the pages smaller than normal (by choosing a smaller % scale in the printing options). Now queue up your favorite TV show (this is going to take a little while!) and cut out all of your little paper butterflies. It took me about 30 minutes to cut out mine. Don’t worry about the teeny tiny antennas on the butterflies, just cut those off when you go around the edges.
Step 2.
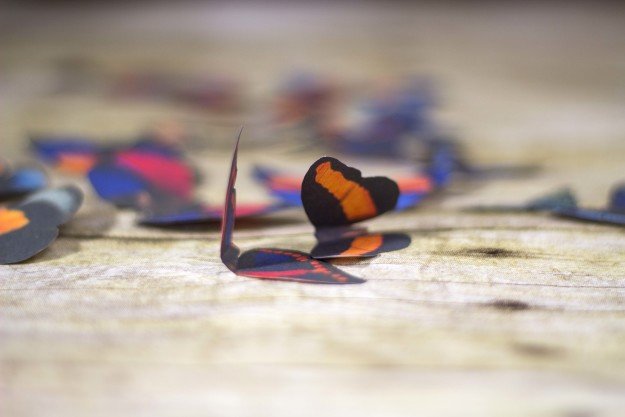
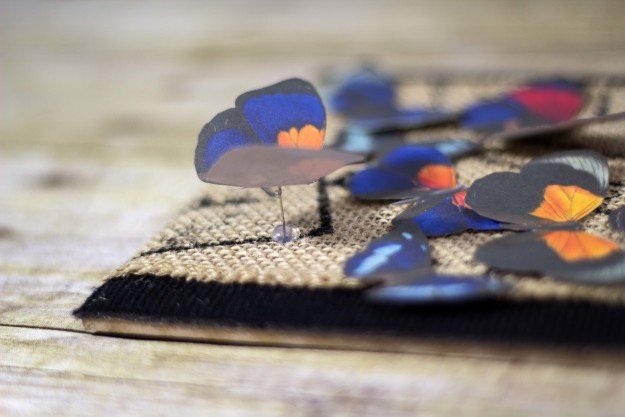
Following the line of the butterflies’ bodies, fold the wings upwards just a little (don’t do it too far, or you’ll see the white on the bottom of the wings when the butterflies are attached. To add even more dimensionality, you can curve the wings a little by bending them over your finger – just tweak them until they look natural.
Step 3.
Find an interesting section of the burlap ribbon, and cut it to the appropriate size for the shadowbox. Leave about an inch of overlap on each side for step 4.
Step 4.
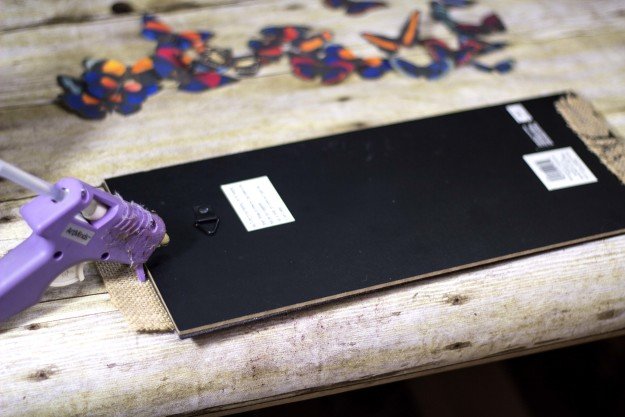
Flip the backboard over (be careful not to wrinkle the ribbon when you do), put a line of hot glue along the edge, and firmly fold and press the burlap edges into the glue.
Step 5.
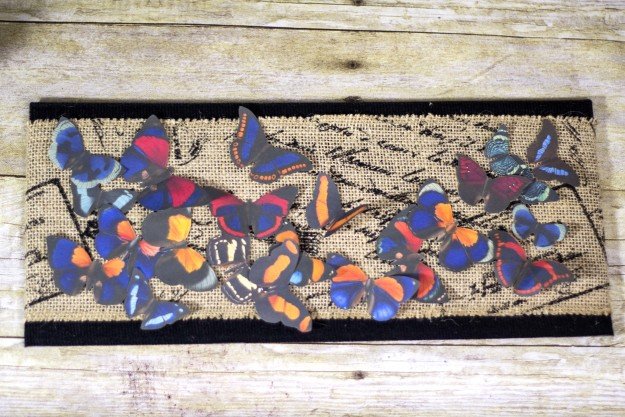
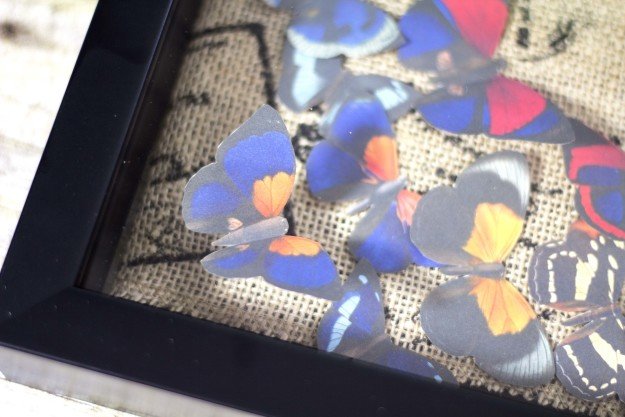
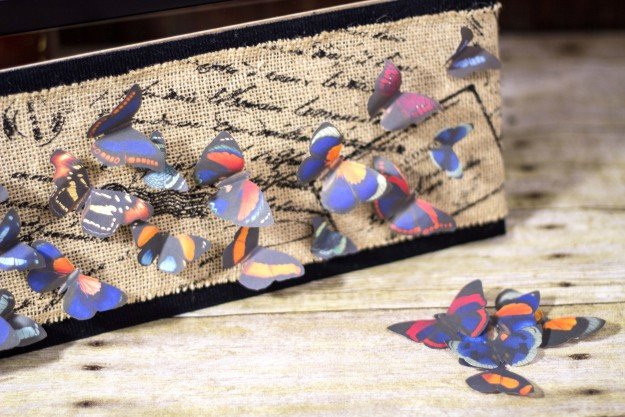
Lay out your butterflies to find a good order for them. I’d like mine to cluster thickly on the left side, and then taper out towards the right, so I arranged them with some of the larger butterflies on the left and the little guys on the right. Now is the time to do the re-arranging before the butterflies are permanently attached.
Step 6.
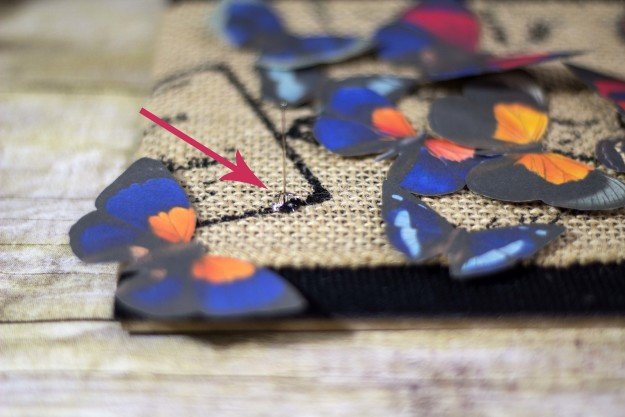
Now that your butterflies are arranged basically how you’d like them, we’re going to move to each of them one by one and attach them. It’s quite easy, but a bit painstaking, so gear up another episode of Downton Abbey and get started! Using a hot glue gun, put a pea-sized dot of glue where you would like your butterfly to go, then stick a head pin into the glue and hold it there for a few seconds until it dries.
Side Note: You don’t want all of your head pins to be the same height, because that wouldn’t make for a very dynamic swath of butterflies. Use wire cutters, or even heavy scissors, to snip the pins to different heights – wire cutters will definitely work best for this!
Step 7.
Now that your first glue dot has dried with the pin in it, it’s time to attach the butterfly! Put another pea-sized dot of hot glue on the bottom of the body of the butterfly and hold it on top of the pin until the glue dries around the top of the pin.
Step 8.
It’s important that your butterflies don’t stick out so far that the glass can’t close against the back panel, so let’s check it after doing one butterfly. Gently set the frame back over the back panel and make sure that it can sit flush without crushing or bending the lovely butterfly that you just attached. Use the first butterfly to gauge how tall you can make all of the other butterflies without hitting the glass.
Step 9.
One by one, attach all of your butterflies, making sure to vary the direction that they are facing by a little bit to give them an organic, fluttery feel. I ended up leaving off a few of the butterflies that I cut out, because I didn’t want to cover the lovely burlap background too much – you want that wonderful, rustic pattern to show through the wings.
Step 10.
Gently nestle the back panel into the frame, making sure to put it in right-side-up for hanging purposes. Lock the tabs down, and you’re done!
That about wraps up our original DIY project on shadow boxes! Thanks for checking us out! Not in a rush? Hang around and check out all of our other great craft projects. Do you have a project that you’d like to share with us? Leave the link in the comments section below and we’ll add it to our roundup! Don’t forget to sign up to our newsletter to get all the latest updates on craft projects in the making. Your feedback matters. The more you comment, the more likely we are do to craft projects in the future. Don’t miss out on any of our DIY’s by signing up to our newsletter.
Like us on Facebook (button below) to get fun craft projects in your feed! Pin your favorite projects to Pinterest to share with friends.
Check out some related craft projects here:
I’m Manas Ranjan Sahoo: Founder of “Webtirety Software”. I’m a Full-time Software Professional and an aspiring entrepreneur, dedicated to growing this platform as large as possible. I love to Write Blogs on Software, Mobile applications, Web Technology, eCommerce, SEO, and about My experience with Life.

