How To Crochet A Hat | Crochet For Beginners
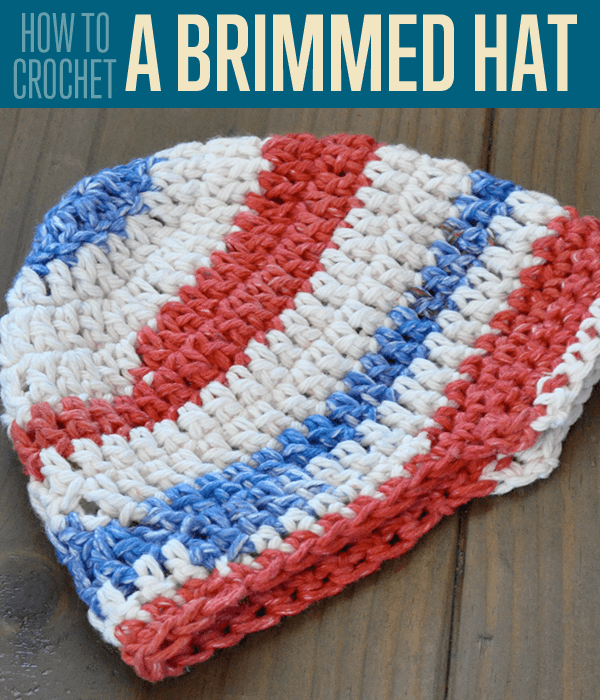
Your First Crocheted Hat: How to Crochet a Hat With Brim
The pattern provided will make a hat to fit a 6-12 month old baby. Learning the basics of crocheting can seem like a tough task, but it most certainly isn’t. With this simple instructional how-to you’ll be crocheting like an expert in no time. Remember that crocheting takes time and patience. Please refer to our basic crocheting tutorial for all the terminologies! We want you to be super familiar with how to crochet before.
Stitches used to make this pattern:
- Double crochet
- Single crochet
- Single crochet decrease:
Stitch Instructions:
-
- Insert hook into chain
- Yarn over and draw yarn through loops; you should now have two loops on your hook
- Now, insert hook into next chain
- Yarn over and draw yarn through loops; you should now have 3 loops on your hook
- Yarn over again and draw yarn through all 3 loops on hook
Step 1.
Gather your supplies
You will need:
- Size 4/worsted weight cotton yarn
- Size H crochet hook
- scissors
- tapestry needle for weaving in the ends
- measuring tape
- stitch markers or safety pins
Step 2.
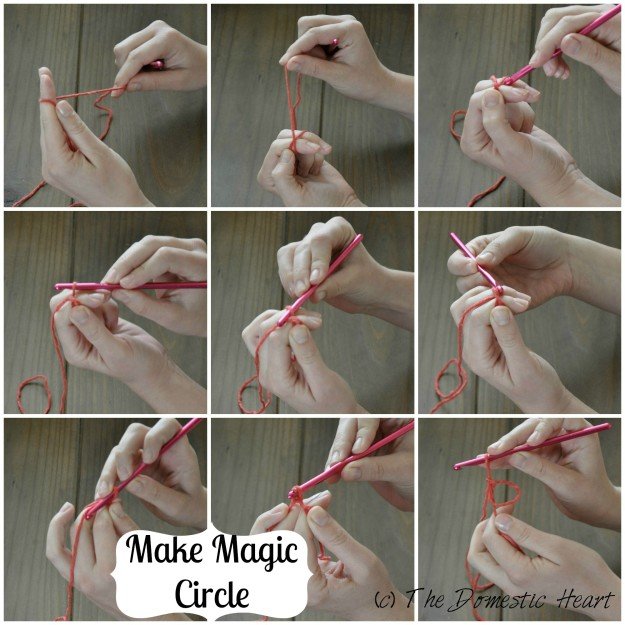
Start with a Magic Circle:
Stitch Instructions:
A: Wrap the yarn around your first two fingers, making a loop
B: Insert your hook under the first loop of yarn, reaching for the one behind it
C: Use your hook to grab the yarn that is behind the loop and pull it through
D: Repeat this step 3, picking up another piece of yarn and pulling it through again
E: You should now have a loop like the picture.
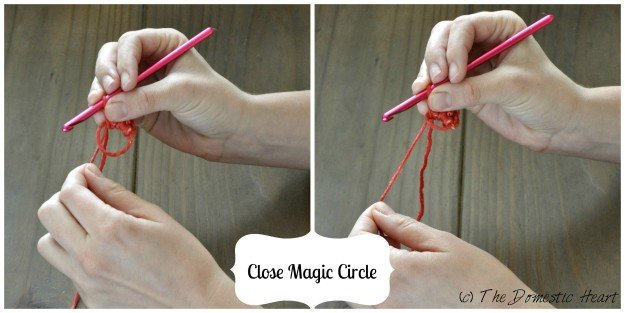
You are now ready to begin the first row of stitches in the pattern. You will crochet into the loop you have created.
Step 3.
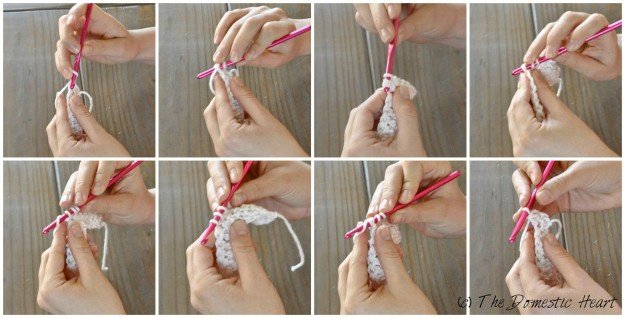
Crochet the first row into the loop as shown, following hat pattern:
Hat Pattern:
Round 1: ch 2, DC 8 in Magic Circle, sl st in top of ch. 2, pull Magic Circle closed (8 stitches made), join with a slip stitch to first stitch.
Round 2: ch 2 (insert stitch marker here if using and each time around), DC 2 in each stitch around, join with sl st in top of ch 2 (from beg. of row). (16)
Round 3: ch 2, *DC in first stitch, 2 DC in next stitch,* repeat from * around, join with sl st in top of ch 2. (24)
Round 4: ch 2, *DC in next 2 stitches, 2 DC in next stitch,* repeat from * around, join with sl st in top of ch 2. (32)
Round 5: ch 2, *DC in next 3 stitches, 2 DC in next stitch,* repeat from * around, join with sl st in top of ch 2. (40)
- At this point you should have a flat circle with a diameter measuring approximately 4.5-5 inches; measure the diameter through the middle with a measuring tape.
- Size can vary slightly depending on how tight you hold the yarn as you crochet. If your size is much too large or small, try following the pattern with a larger hook (to make larger) or a smaller hook (to make smaller).
Rounds 6-11: ch 2, DC in each stitch around, join with sl st in top of ch 2. (40)
Step 4.
Brim:
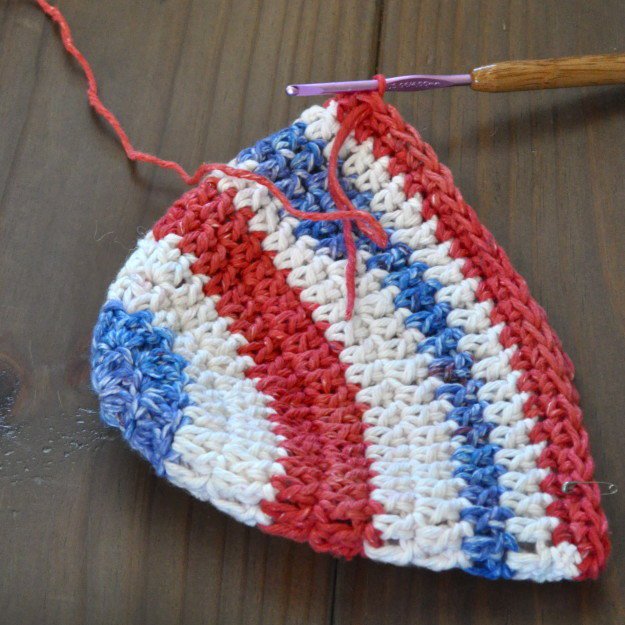
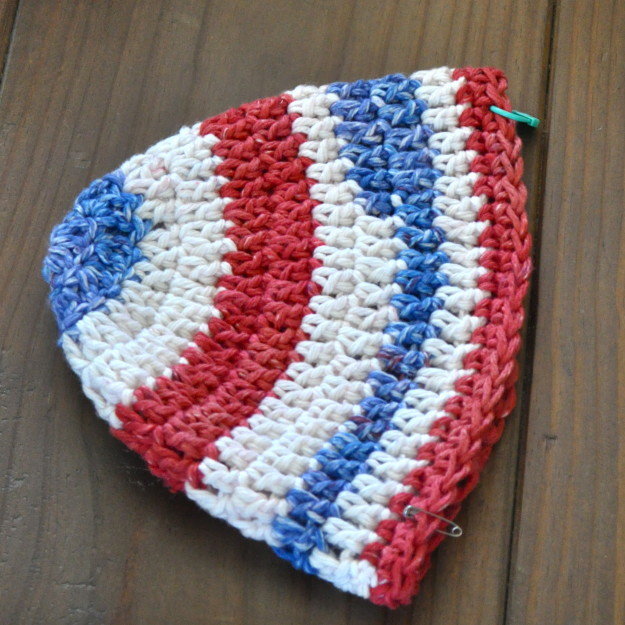
Lay hat flat with the seam at the back.
Find the stitch on the right side seam of the folded hat and count in 3 stitches toward the middle of the hat; mark this with a stitch marker or safety pin. Repeat on left side.
These markers are where you will start your brim.
Row 1: Join your yarn to the first stitch you marked and crochet SCs across to the other marked stitch, ch. 1, turn
Row 2: SC decrease in first 2 stitches, SC across, SC decrease in last two stitches, ch 1, turn
Row 3: SC decrease in first 2 stitches, SC across, SC decrease in last two stitches, ch 1, turn
Fasten off.
Now, find an adorable baby to put your hat on!
Note: the yarn I used is “American Stripes” by Sugar ‘N Cream
That’s all! We hope you enjoyed our tutorial on how to crochet a hat. For more information regarding terminologies with crocheting, we recommend you visit our beginners crochet lesson in the related posts field below!
Have some more Stockinette Stitch craft projects that you’d like us to attempt? Leave your feedback in the comments section below and we’ll do our best to make it happen. Are you a crochet expert? Tell us how this tutorial worked out for you! We appreciate your feedback. Can’t find what you’re looking for? Suggest a fun project and we will get our team on it faster than you think. We love hearing from our subscribers.
Don’t forget to sign up to our mailing list to get the latest and greatest on everything DIY related.
Check out our Facebook page (button below) and follow us to get a quick look at our daily projects. Pin It to Pinterest to share our DIY craft projects with friends.
For more related posts:
Nikon Z50II preview
I’m Manas Ranjan Sahoo: Founder of “Webtirety Software”. I’m a Full-time Software Professional and an aspiring entrepreneur, dedicated to growing this platform as large as possible. I love to Write Blogs on Software, Mobile applications, Web Technology, eCommerce, SEO, and about My experience with Life.

