DIY No Sew Bow Pillow Covers Two Ways
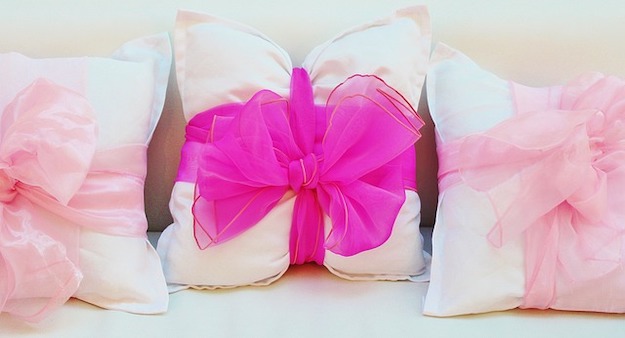
Want ideas for no sew pillow covers? If you love pillows as much as I do, this would be the perfect DIY project for you. It’s quick, easy and best of all, you don’t have to sew. This isn’t just a great craft project but it’s also a cheap room decor to add color and style to your room. So find out how to make a no sew pillow cover two ways!
Pillows should be comfortable, but who said they can’t be cute and fashionable too? Buying pillow covers can be expensive and it also doesn’t always suit my taste all the time. That’s why I made this step-by-step tutorial, to share with you how you can make pillow covers that you can easily customize. And if you want to see how it’s done, you can watch the video from SoCraftastic too! So let’s get started making these no sew pillow covers!
No Sew Bow Pillow Cover 1 | Square Pillow
What you’ll need:
- 18 x 18 inch square pillow
- 44 x 44 inch fabric (any color you like)
- 8 x 5 inch fabric (for the center of the bow)
- rubber bands
- hem tape
- fabric glue
- iron
- embroidery floss
- scissors
Step 1
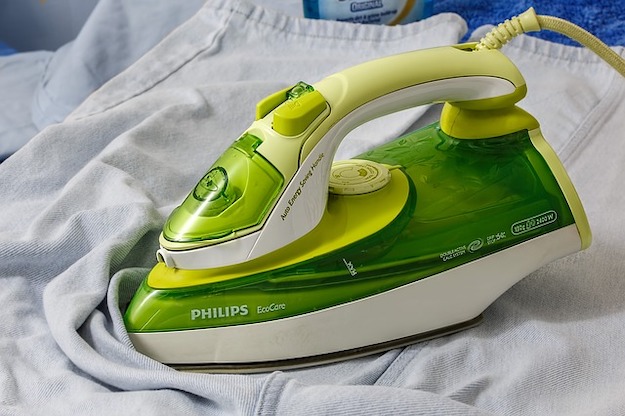
This is an optional step depending on the fabric that you’ll be using. But just to make your no sew pillow cover prettier, iron your fabric first!
Step 2
Lay your fabric out and put the pillow in the center. To get a more finished look, put some hem tape on both edges or on the edge that will be on top.
Note: If this is your first time using hem tape, don’t worry! Just put some tape about an inch from the edge fold it and apply some heat using an iron to make the fabric stick together.
Step 3
Cover the pillow with the top and bottom fabric. If you only put hem tape on one edge of the fabric like I did, make sure that if covers the fabric that doesn’t have it. Add some fabric glue to secure them.
Step 4
Fold the flaps in a triangular shape and hold them securely with a rubber band. Take your time on this step until you’re pleased with how you’ve folded the fabric. If it gets too stuffy, you can also cut some fabric from the inside. Do it on the other side too.
Step 5
Get your embroidery floss or string, preferably the same color as your fabric, to tie the ends and make them more secure. Once you’ve done that, remove the rubber bands.
Step 6
Cut any excess fabric from the ends if necessary and to hold the ends securely, apply some fabric glue.
Step 7
Now for the center of the bow, you’ll need to cut 8 x 5 inches of fabric. Put hem tape on both edges and heat it up with an iron. Once that’s done, slide it under the semi knot you made and put some fabric glue to make sure it stays on place. Wrap the fabric around the center and seal it off with more fabric glue.
Let it dry and you’re done! (I’d recommend putting something heavy on top to make sure that the fabric glue can do it’s magic!)
No Sew Bow Pillow Cover 2 | Rectangle Pillow
What you’ll need:
- 18 x 13 inch rectangular pillow
- 33 x 41 inch fabric (any color you want)
- 6 x 31 inch fabric (for the middle)
- a long scrap fabric (you’ll use this to tie your pillow)
- scissors
- hem tape
- fabric glue
Step 1
Lay out your main fabric and put the pillow in the center. Now fold the top and bottom edges to cover the pillow followed by the edges on the left and right side.
Step 2
Take your scrap fabric and tie it around the center of the pillow. Pull on it tightly until the pillow is squeezed in the middle like the photo above.
Step 3
Now that your pillow looks a bit like a bow, take your remaining fabric, 6 x 31 inch, and put some hem tape on the edges for a finished look.
Step 4
Wrap your hemmed fabric around the middle of your pillow. Cut any excess if necessary and secure it with some fabric glue. Be sure that you glue it at the back where you tied the scrap fabric.
Let it dry, and you are done!
Make it in any color or kind of fabric that you want. In case your pillow isn’t the same size as what we did, I’d recommend you start with at least one and a half yard of fabric and cut from there. It’s always better to have more fabric than less with any kind of project.
Aren’t these no sew pillow covers the cutest? They’re so easy and fun to make and would also be a great room decor. Have fun making these DIY projects in a flash!
If you’d like to watch how it’s done, check out this video on how to make a no sew pillow cover from SoCraftastic!
Did you enjoy our post on how to make a no sew pillow cover? Let us know in the comments section below what your thoughts are on these no sew pillow covers. Do you have any other craft ideas you’d like to share? Share it with us and we’ll give it a try. We love doing cool DIY projects by making craft projects, home decor projects, upcycling ideas, recipes, tutorials and anything you can do yourself. That’s why we created this site, we want people to be more in touch with their creative side and realize that there’s a lot of things that they can do themselves. We’d love to hear from you and create a community of DIY enthusiasts where any project is just a click away. Stay connected with us on Facebook, Twitter, Pinterest and Instagram!
Want more craft projects to work on? Check out more of our posts below:
DIY Pom Pom Pillow Throw Cover
How to Sew a Pillow | Make DIY Throw Pillow Covers
No Sew DIY Shirt Scarf | How To Cut T-Shirt Tutorial
I’m Manas Ranjan Sahoo: Founder of “Webtirety Software”. I’m a Full-time Software Professional and an aspiring entrepreneur, dedicated to growing this platform as large as possible. I love to Write Blogs on Software, Mobile applications, Web Technology, eCommerce, SEO, and about My experience with Life.

