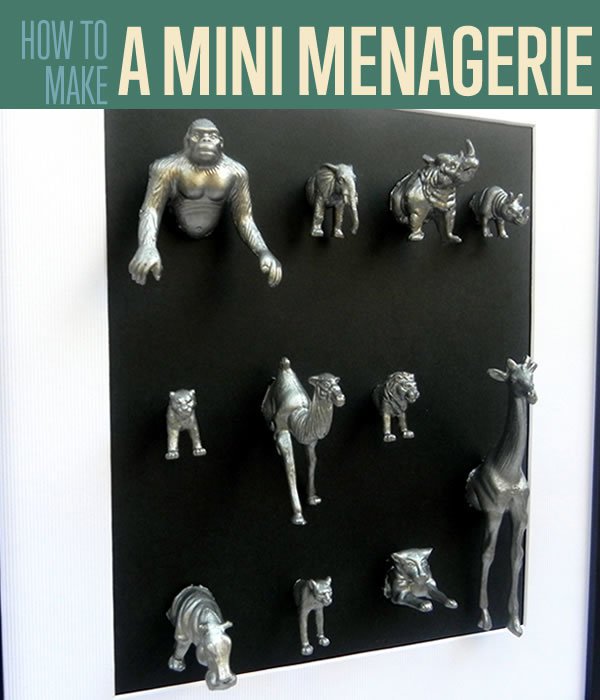
DIY Mini Animal Specimen Art
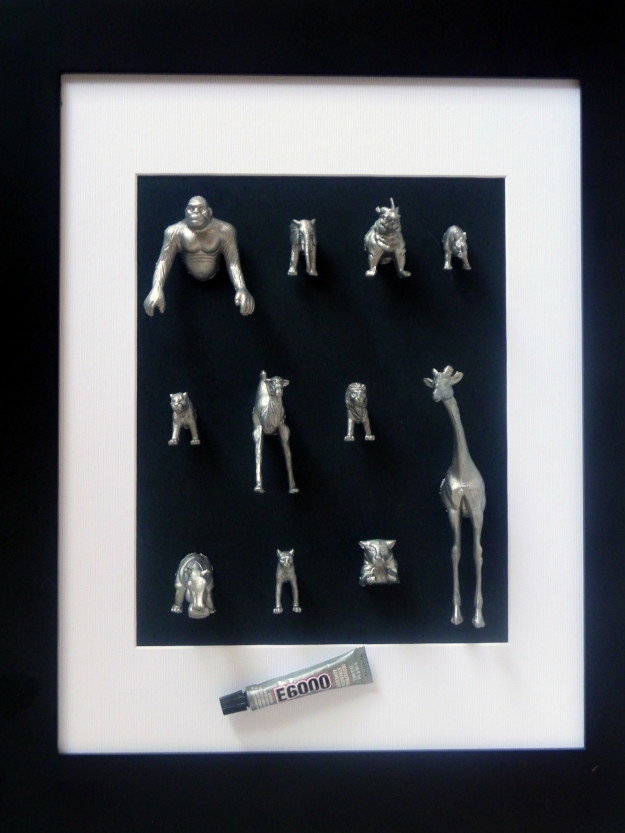
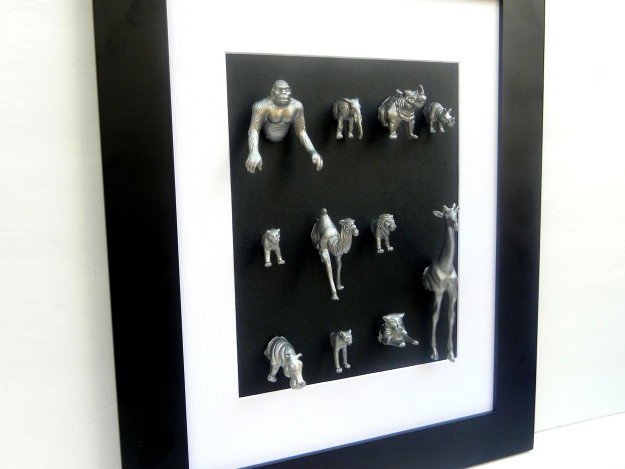
Have you ever heard of micro crafts? We sure have! Micro crafting is working with well…little things! We love the idea of tiny everything, so today we’re going to show you how to decorate with tiny plastic animal sculptures. The best part? You get to use a rotary tool and saw plastic in half. You don’t have to be a kid to enjoy these adorable little plastic animals. Especially once they’re gilded silver and mounted in a beautiful frame! This easy art is an instant conversation starter and is sure to be the highlight of any decor – simply customize to your room’s colors!
Alright, so you’re ready to get started. Make sure to gather your tools accordingly and let’s get started! Here’s our super quick and easy tutorial!
You’ll need:
- Small plastic animals (raid your kids’ room, or pick some up at the toy store)
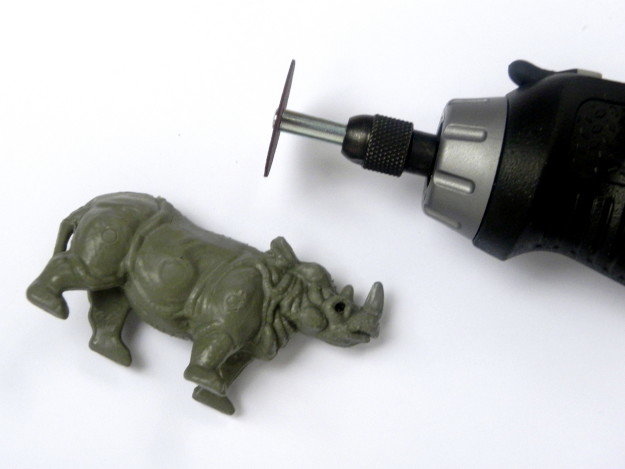
- Rotary tool with a standard mandrel attachment and a bunch of cut-off discs
- Liquid gilding (you could also use spray paint)
- Paintbrush
- Frame
- Cardstock (I used black, you could use white or another complementary color)
- E6000 glue
How-to:
Step 1.
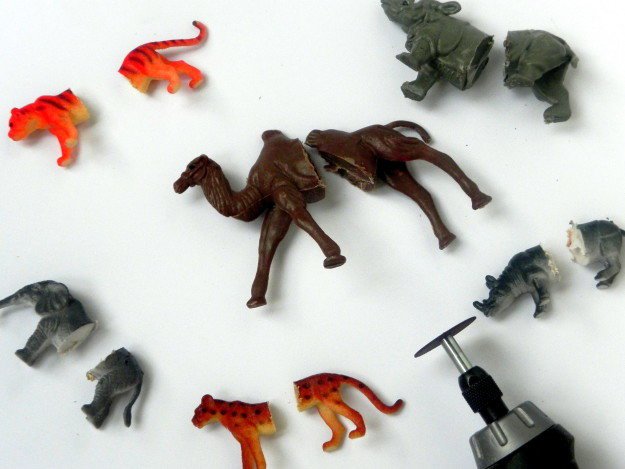
Use your rotary tool to cut the animals in half. You’ll need a bunch of cut-off discs as they break away pretty easily when cutting through hard materials. Try to keep your cut straight so you have a flat surface to glue to the frame. Do this carefully! Go outside, wear safety goggles and a dust mask!
Step 2.
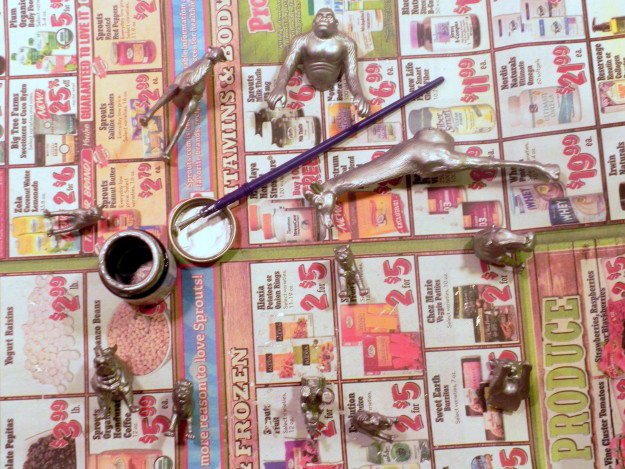
Paint your animals in a well-ventilated area. Let dry thoroughly.
Steps 3-4.
Take your frame apart and insert cardstock, followed by any matting and then the glass. This way, if you decide you want to use the frame for something else one day, you can! Apply a dollop of E6000 glue to the back of each animal and firmly hold in place for a few seconds. Let dry overnight before holding the frame upright.
This would be such a fun project to do with the kids’ old toys as a way for them to preserve their childhood memories in a chic way. But I really like it as a whimsical piece of art! Get creative and use different types of animals – like fish, dolphins, whales painted bright teal for a seaside theme, or cats and dogs if you’re an animal lover.
This tutorial is so simple you’ll most likely want to share it with friends and family – so go ahead! We love when you share our projects. Take the time to poke around our site and see what tickles your fancy. We’re confident there’s something here for everyone. Why not try something new? How did this project work out for you? Leave your feedback or questions in the comments section below and we’ll answer to the best of our ability. If you have a fun project that you’d us to give a whirl, let us know in the comments as well. We love hearing from you! The more you comment, the more likely we are to do craft projects like that in the future!
Thanks and happy DIY’ing.
Don’t forget to sign up to our newsletter to get all the latest updates on craft projects in the making!
Like us on Facebook (button below) to get fun craft projects in your feed! Pin your favorite projects to Pinterest to share with friends.
Check out some related craft posts here:
I’m Manas Ranjan Sahoo: Founder of “Webtirety Software”. I’m a Full-time Software Professional and an aspiring entrepreneur, dedicated to growing this platform as large as possible. I love to Write Blogs on Software, Mobile applications, Web Technology, eCommerce, SEO, and about My experience with Life.

