DIY Doctor Who Book Bag from Upcycled Clothing | Personalized Tote Bags
You are here: Home / Create and Decorate / DIY Doctor Who Book Bag from Upcycled Clothing | Personalized Tote Bags
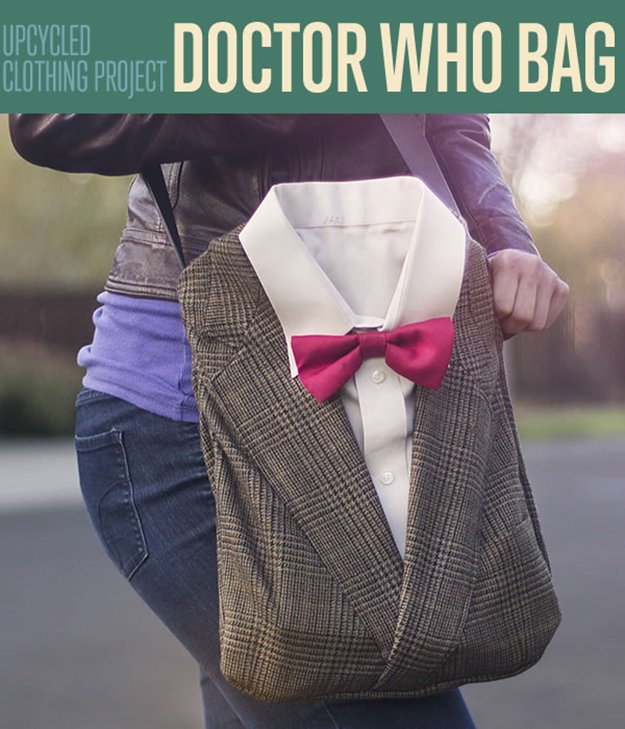
Whovians will love your one-of-a-kind book bag tote styled to look like the 11th Doctor! With the charming signature crimson bow tie and the professorial tweed jacket, this bag will unmistakably show your love for all things wibbly-wobbly and timey-wimey! This is an amazing tote bag pattern you can follow in this tutorial.
Supplies:
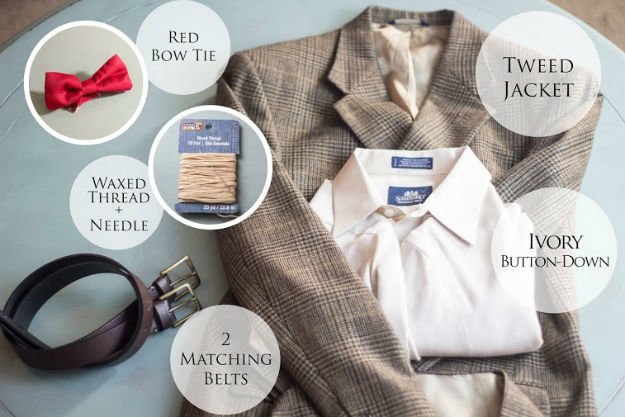
- Tweed Jacket
- Ivory Button-Down Shirt
- Red Bow Tie
- 2 Matching Leather Belts
- Waxed Thread (Michael’s in the Leather Section)
- Thick Needle (with wide eye)
Tools from Around the Craft Room:
- Sewing Machine
- Thread (brown, ivory, crimson)
- Scissors
- Rotary Cutter (optional)
- Quilting Cutting Mat (optional)
- Seam Ripper/Razor Blade
- Iron + Ironing Board
- Power Drill/Dremel (with small/medium drill bit)
Step 1
Use a seam ripper or a razor (an exacto-knife works wonders!) to severe the satin lining from the jacket until they are completely separated.
Step 2
Remove the sleeves from the jacket (we won’t need them, and they get in the way if you leave them on).
Step 3
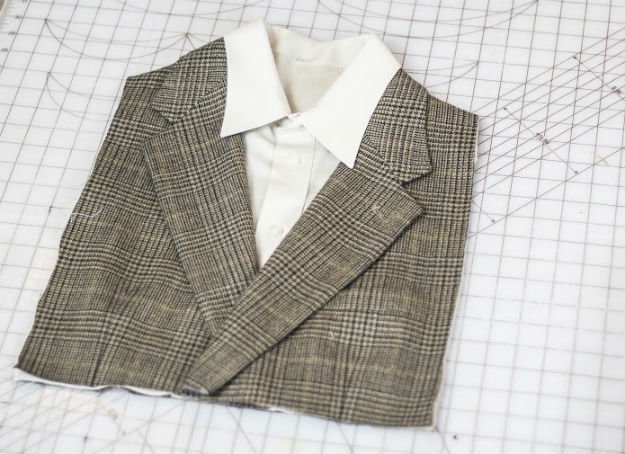
Put the button-down shirt into the jacket and line everything up the way you want it with the collar, the lapel opening, etc.
Step 4
Using a rotary cutter and a cutting mat, slice your jacket-shirt-sandwich into a nice, even rectangle.
Step 5
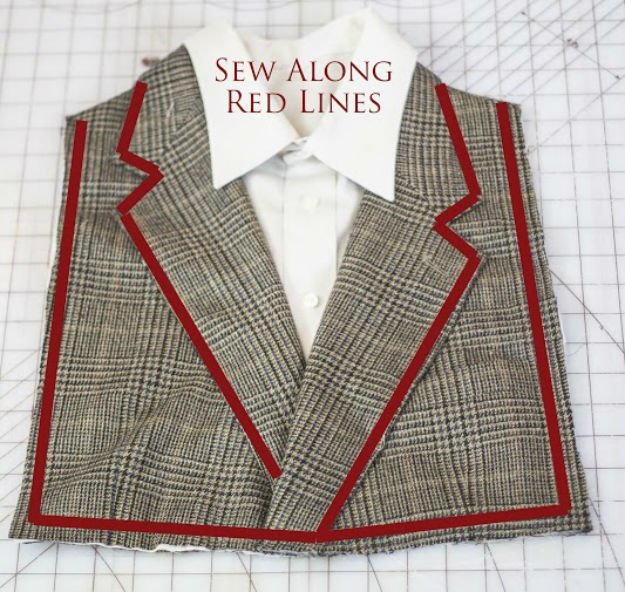
We are going to turn this entire section we just cut out into one half of the book bag, so to keep it all nicely together, sew around the edges (except for the top). With matching thread that blends in, sew along the outer edges of the lapels to hold them down. This will also anchor the shirt in place.
Step 6
Let’s cut out the back of the bag! I thought it would be really convenient to have a pocket/pouch on the back of the bag (for cell phone, keys, etc.), so I decided to utilize the pocket area of the jacket – instant compartment!
So, you’ll want to cut out a section of fabric (with that pocket in the center) that is just slightly bigger that the front panel of the bag that we just worked on in steps 1-5.
Now take the satin lining that we separated from the jacket in step 1 and cut out a section that matches the back panel of tweed that you just cut out.
Step 7
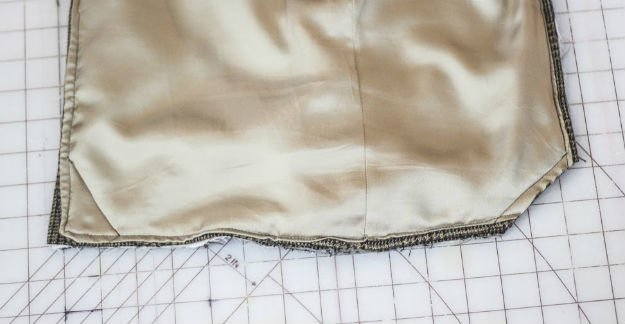
We’re going to sew the tweed back to the satin, so place those two panels with “right sides” together and pin them around the edges.
Sew the two panels together, leaving about a 4” wide opening along the bottom.
Step 8
Reach your hand into the opening at the bottom, and right-side-out everything you just sewed (see picture for step 8).
Step 9
Press the edges so that the lines are nice and clean.
Step 10
Time to sew the back and front of the bag together! Grab the front-of-the-jacket panel that you sewed earlier, and the back panel that you just finished pressing, and lay them together. With the “right sides” together, pin around the bottom and sides.
Sew along the sides.
Step 11
To give the book tote a nice, spacious carrying area in the bottom that has some width, we’re going to alter the corners just a bit. On the bottom two corners, stitch (and backstitch) across the corners, creating a neat little triangle. Then use your rotary cutter to slice away the corner, now that you have a new seam (you can see how I cut away the corner on the right side of the Step 11 photo – just repeat for both corners).
Step 12
Now right-side-out the whole bag. Things are starting to come together!
Step 13
To begin working on the shoulder strap for the bag, take the two matching leather belts and buckle them together into one long belt.
Use an exacto knife to slice off the belt buckle at the very end of the duo (so that you just have one buckle in the middle).
Step 14
We’re going to be utilizing the existing holes in the belt, but we need some more holes, as well. Using a power drill with a small/medium drill bit, add some holes through the leather so that you have a nice line of little holes (see photo for step 14).
One end of the shoulder strap will naturally not have any holes on it to start with, so simply drill a line of them, and you’re ready to start sewing!
Cut a length of wax thread, and tie it through the bottom leather hole with several really tight knots.
Time to start sewing/weaving through those leather holes! Working in the existing side seams of the tote bag (to hide the wax thread when you pull it tight), poke your needle + wax thread through the leather and through the fabric, back through the leather, back through the fabric (see the photo for Step 15). By “stitching in the ditch” of the side seam like this, you can secure the leather shoulder strap very firmly to the inside of the bag, while hiding the outside stitches almost completely in the fold.
When you’ve woven through all of the leather holes, tie your wax thread off tightly with several knots!
Step 15
Cut the straps off of your red bow tie, and use a basic hand stitch (with matching red thread) to secure the bow tie in the collar of the shirt. Just give it a sturdy tack-down and that will do nicely! If you want a super fast solution, simply apply a generous amount of hot glue to the back of the bow tie center and press it into place.
You’re done! Adorably nerdy, and super functional, you can bring this fun DIY tote bag with you everywhere!
Did you enjoy our post on how to make a tote bag? Let us know in the comments section below what your thoughts are on this easy personalized tote bag tutorial. Do you have any other craft ideas you’d like to share? Share it with us and we’ll give it a try. We love doing cool DIY projects by making craft projects, home decor projects, upcycling ideas, recipes, tutorials and anything you can do yourself. That’s why we created this site, we want people to be more in touch with their creative side and realize that there’s a lot of things that they can do themselves. We’d love to hear from you and create a community of DIY enthusiasts where any project is just a click away. Stay connected with us on Facebook, Twitter, Pinterest and Instagram!
For more DIY crafts and tutorials, see these posts below:
DIY Jewelry Organizer | Necklace Holder
Leather-Feather Metallic Statement Necklace
Homemade Resin Jewelry Made from Pressed Flowers
I’m Manas Ranjan Sahoo: Founder of “Webtirety Software”. I’m a Full-time Software Professional and an aspiring entrepreneur, dedicated to growing this platform as large as possible. I love to Write Blogs on Software, Mobile applications, Web Technology, eCommerce, SEO, and about My experience with Life.

