Build This DIY Multifunctional Outdoor Table
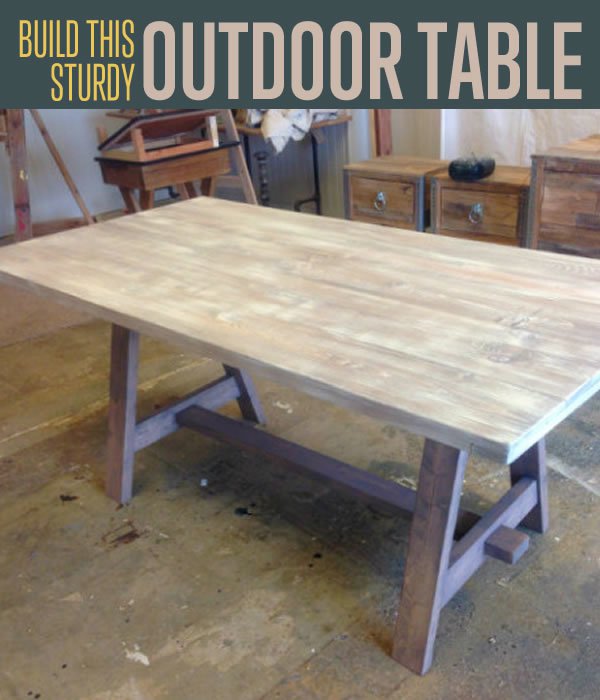
If you were to guess why I decided to build this DIY outdoor table, cooking probably wouldn’t be one of them, right? But it’s true. I built this outdoor table because of my love for cooking. I never pass up on a good cook out with friends and family.
I designed this outdoor table with ease of use in mind. The top comes off for easy storage in the garage during the winter months. And if you’re planning to use it as a farmer’s table type of dining table indoors, you can use RustOleum satin interior poly on the finish, just as I do with all my indoor projects.
Another thing I did particularly for this DIY outdoor table is that, unlike other outdoor tables with a sawhorse design, I tweaked it a little bit to a one large sawhorse. This is because I didn’t want the table to have too many legs for chairs to bump into.
Let’s get started building this DIY Outdoor Table.
I hope you have fun building it!
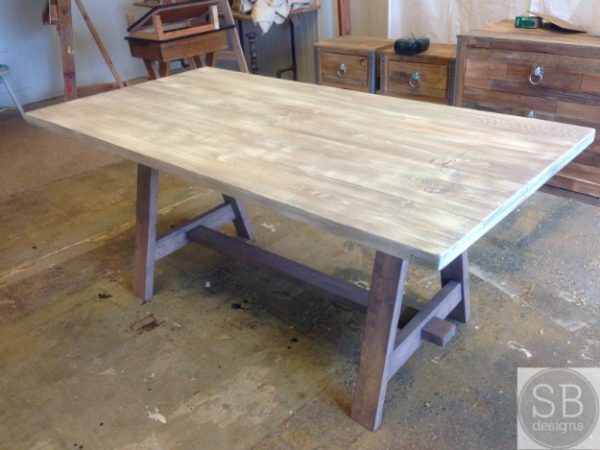
Tools and Materials
- Saw
- Measuring tape
- Kreg Jig Pocket Hole system
- 1 ¼” PH screws
- 2” PH screws
- Sander
- 120, 220 grit sand paper
Part 1 of How to Make a DIY Outdoor Table: Building the Base

STEP 1: Starting with the table base, begin by cutting your boards to this cut list:
- 2×4’s:
- 1 – 48”
- 4 – 12”
- 4 – 28” ends cut at 15 degrees of square parallel angles (measurement taken from long point to short point)
- 2 – 18 ½” 15 degrees, not parallel (short point to short point)
- 1 – 44 ¼”
- 2 – 3”
The table I made is 72” Long and 36” Wide. If you would like a different-sized table, adjust your sawhorse base by adding or subtracting based on your desired dimensions. After cutting your pieces, sand all boards with 120 grit sand paper.


STEP 2: Make two pocket holes in one end of each of the 12” pieces. Using 2” PH screws, join the four 12” pieces to form the letter I.

STEP 3: With the 28” angled cuts, make two pocket holes at one end of each board, as well as both ends of the 18 ½ angled pieces. Measuring 5” up from the non-PH end, attach the stretchers to two legs. Repeat this process for the other set of legs.
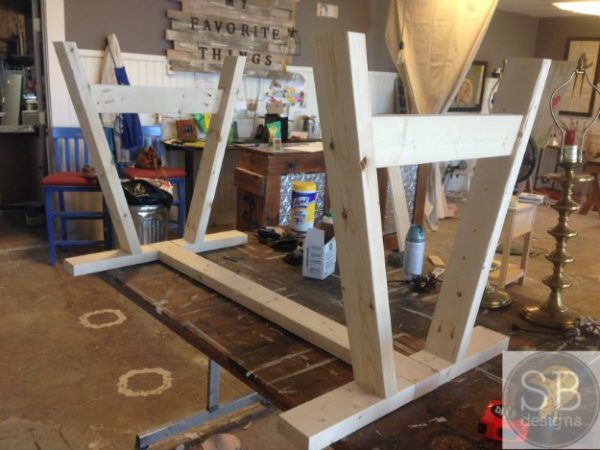
STEP 4: With the “I” facing upwards, space the legs evenly before attaching it with 2” PH screws. Then, make pocket holes in the remaining 3 pieces of wood, the two 3” get ¾” pocket holes.

STEP 6: Attach to the stretcher using 2” PH screws for the long board, and 1 ¼” PH screws for the little pieces.
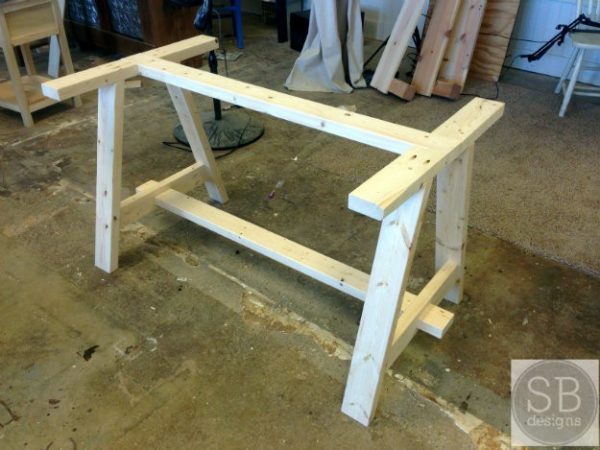
STEP 7: Flip the entire structure over and the base of your DIY Outdoor table is done.
Part 2 of How to Make a DIY Outdoor Table: Building the Tabletop

STEP 1: Arrange your boards with what looks best to you. I chose to alternate my 1×8” with the smaller and larger boards.I wanted a pieced together plank top, so I choose three 1×8”, one 1×10”s and one 1×6” all at 72” long to form my table top. My actual width is 36 ⅜”. This may vary slightly depending on your boards.

STEP 2: If you are using 5 boards, take the 2nd and 4th board and make pocket holes going to both edges. Work from the middle and make your way out. Checking that it’s square as you go. and that the ends align flush.

STEP 3: For extra support, and to make carrying the tabletop easier, as well as give the top a bulkier appearance, trim the rim with 1×3”s and 1×2”s. pre-drill the holes, add wood glue, and screw with 1 ¼” wood screws.

STEP 4: Flip the completed tabletop over and sand again with 120 grit sand paper. I like to round the edges to give the wood a worn in look. Don’t forget to round the edges of the table where your arms rest too. You don’t want to sharp edges to your DIY outdoor table, especially if you have little kids at home.
[EXTRA] Part 3 of How to Make a DIY Outdoor Table: Staining
I wanted a “polished rustic” look, so I mixed 3 different stains together to achieve the look I was going for. Feel free to stain it any color you want! This is how I got this look:
Materials
- 1 half Drift Wood Rustoleum Wood stain
- ¼ Dark Walnut Rustoleum wood stain
- ¼ Grey Weathered Rustoleum wood stain
How to Stain Your DIY Outdoor Table

STEP1: Mix all three together in a separate container. This can be a very messy process. I would recommend using the pour spouts you can purchase at most home improvement stores. It will help tame the mess.
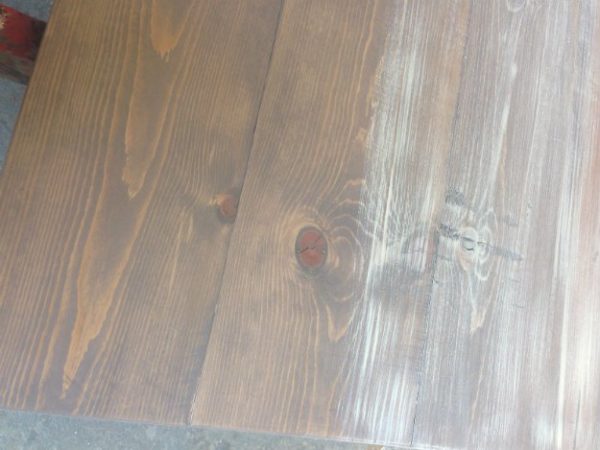

STEP 2: The process of staining isn’t an exact science, so just play around with mixing the stains to get the color you are happy with.
Viola! Your very own DIY Outdoor Table.

Do you want more DIY for your home? Check out these cool DIY projects:
Build This DIY Rustic Kitchen Island | Cheap Kitchen Renovations
IKEA Hacks |DIY Furniture You Must Try
How to Make a Sawhorse | DIY Simple Woodworking Plans
I’m Manas Ranjan Sahoo: Founder of “Webtirety Software”. I’m a Full-time Software Professional and an aspiring entrepreneur, dedicated to growing this platform as large as possible. I love to Write Blogs on Software, Mobile applications, Web Technology, eCommerce, SEO, and about My experience with Life.

