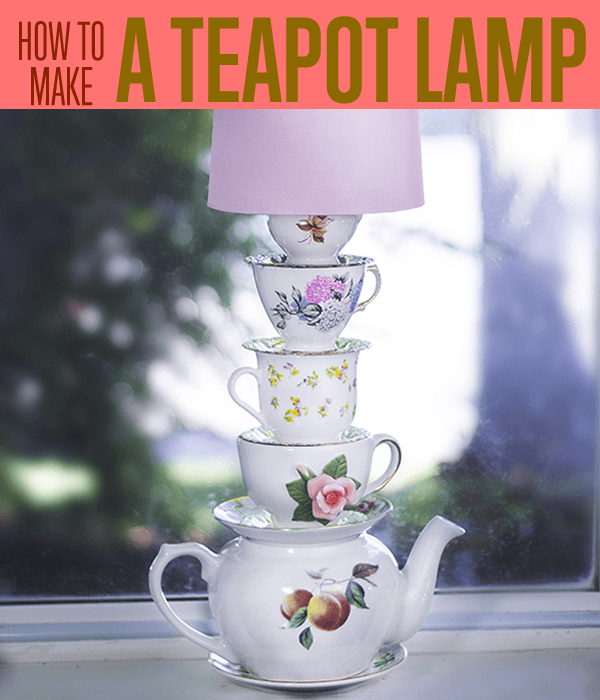
Alice In Wonderland Style Stacked Teacup Lamp
Snuggle up with a Jane Austen novel and read by the light of this charming, up-cycled lamp! Adorable and easy, this project can be completed with up cycled items, zero power tools, and basic crafting skills. If you’re interested in whimsical projects, then this is the DIY for you! All you need are a few simple supplies that you can either thrift (to save money) or buy if you’re determined to make it right away! Either way, we guarantee you’ll love this adorable teacup lamp.
Alright, so you’re ready to get started? It’s time for a lovely afternoon full of teacup madness. Check out how it’s made below!
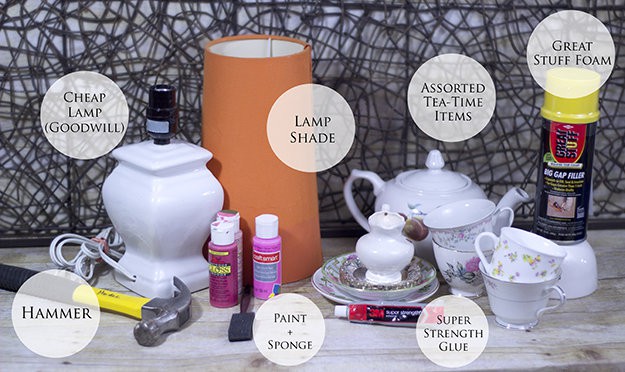
Supplies:
- A cheap lamp from the thrift store. We’re going to be smashing it into pieces with a hammer, so pick any hideous and cheap porcelain/glass lamp that will be fairly easy to extricate the lighting system from.
- A lamp shade. If you want to save yourself some time, you can go to your local home store and purchase a small lamp shade that you love. Or, if you want to get extra thrifty, you can pick up a shade at the thrift store that will be easy to paint or re-cover. I found this shockingly orange lamp shade for only $2 and plan to paint it pink, since this lamp is going into a baby girl’s nursery when it’s finished!
- Tea cups, tea pots, saucers, and any cute porcelain dishes that will look lovely stacked together. I only had to visit the thrift store once to find the whole collection of tea time eating-ware pictured. People may wonder why you’re stacking things in the dish aisle, but it’s a delightful treasure hunt to find pieces that fit together!
- Acrylic paint and sponge/paintbrush. This is only needed if you’re going to paint your lamp shade. If you found a shade that you love as it is – that’s great! No paint or sponge required.
- A hammer.
- (See Step 5 to determine whether you need it) Great Stuff Foam. This stuff is, well, great! You can find it at pretty much any hardware store, and it’s very simple to use. You spray it, leave it, and it expands and dries.
Step 1.
Let’s get that lampshade painted so we can let it dry while we work on the rest of the lamp. Use a paintbrush or sponge to apply a layer (or several, if needed) of your desired paint color to the lamp shade. Really try to coat it evenly, so that the light shines out smoothly, without patches and splotches, when the lamp is turned on.
Step 2.
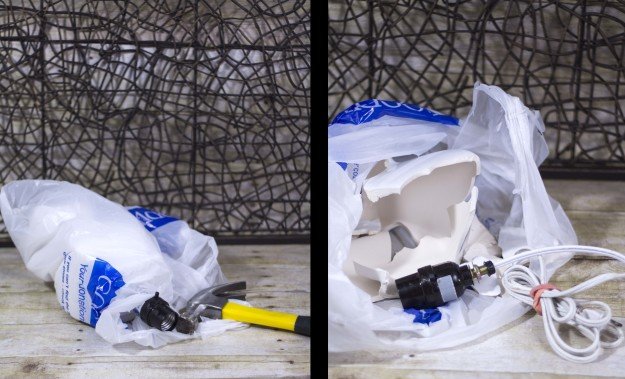
Oh yeah, we get to smash something now! Put your lamp in a plastic bag to catch the glass shards that are going to go flying, and use your hammer to carefully smash away at the lamp until the light fixture inside comes free.
Step 3.
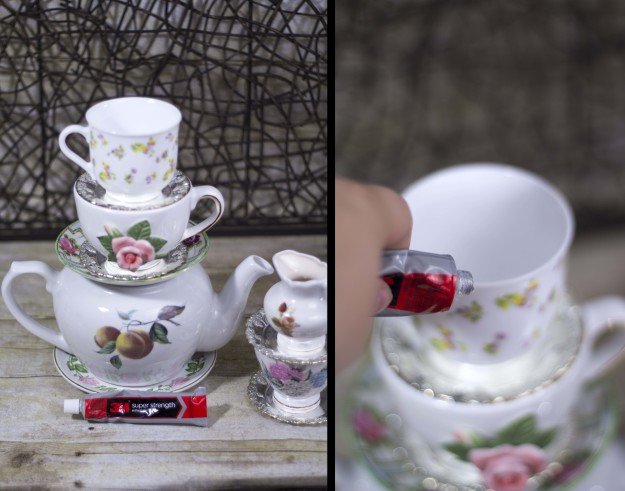
Now for the fun part (well, let’s be honest – smashing things up with the hammer was pretty fun!). After stacking your tea-ware (without glue) to figure out an ideal arrangement, it’s time to glue your pieces firmly into place. Starting from the bottom, follow the instructions on the back of your glue tube to adhere each cup, pot, or saucer to the one above it. Be careful to get them straight – you don’t want to end up with the Leaning Tower of Pisa!
Step 4.
After you’ve set your tower of tea cups aside to dry, it’s time to address the cord. The light fixture is going to be settled, upright into the top tea cup, and you’ll want the cord to come up and over the top edge of the top tea cup. Use a basic rubber band to make the light cord travel straight up the base of the bulb socket in preparation for the next step.
Step 5.
Once the glue holding your tea tower is completely dry (trust me, wait until then – let’s just say I had an…”incident”, which involved a lot of gooey re-assembling of a toppled tower), we can go ahead and attach the light fixture. You have two options for attaching the light fixture:
Step 6.
- I had the good fortune of finding a perfectly suited little milk creamer (it’s at the top of my tower), with an opening that perfectly cupped the light fixture. So, I simply used some more of my super strength, all purpose adhesive to glue it into the top of the tower. Easy peasy. If you like the way that looks, keep a lookout for little creamers and sugar bowls when you’re perusing the aisles of the thrift store, picking out tea cups. Once you’ve glued the light fixture in place, do the same for your lamp shade. I was able to glue my lampshade in place after I glued the light socket down, however you may need to glue your shade first, depending on the shape of your shade on the inside.
- If you have a tea cup at the top of your tower, you’ll have a lot of empty space around your light socket when you set it in. That’s where the Great Stuff Foam comes to the rescue! It is a fantastic, expanding spray foam that will hold your socket in place. Following the instructions on the back of the can, settle your socket into the tea cup (at the level you want it – even if there’s space underneath it) and then use the spray foam applicator to fill the space around your socket.
Important: Now keep in mind, this is expanding foam! Don’t fill your whole tea cup, otherwise it will swell over the sides and around the switch and opening of the light socket – yikes! Only fill it about half way, and let it expand as it dries. If you put too much, don’t freak out – it’s very easy to trim away excess with a kitchen knife after it dries (just don’t let it get into the electrical components of your light socket!)
A Friendly Note About the Cord
Notice in the image for Step 5, that the lamp cord is running freely down the back of the tower of cups. I opted to use this method to save myself from having to invest in a power tool that would allow me to drill through porcelain (which I would need to make the cord run down through all of the cups). When my lamp is set on a desk or end table, I just make sure the cord side is facing the wall, and the cord disappears from view quite nicely! If you want to get even more fancy, you can use your super-strength glue (or a hot glue gun) to adhere the cord to the tower down the back, keeping it flush.
Grab a book, a blanket, a snuggle buddy on a rainy day, and curl up next to this lamp to enjoy a good read – you’re done! Thanks for checking out this awesome project! We’d love to hear how it worked out for you. Leave us your feedback in the comments section below.
Don’t forget to Like Us on Facebook (button below) and Pin your favorite projects to Pinterest!
Check out some related posts here:
I’m Manas Ranjan Sahoo: Founder of “Webtirety Software”. I’m a Full-time Software Professional and an aspiring entrepreneur, dedicated to growing this platform as large as possible. I love to Write Blogs on Software, Mobile applications, Web Technology, eCommerce, SEO, and about My experience with Life.

