4 Awesome Gift Wrapping Ideas | Gift Wrapping Tutorials
Impress your loved ones with these four astounding gift wrapping ideas that have your eye for detail and design!
Gift Wrapping Ideas | How To Gift Wrap Perfectly
Have you been wondering how to wrap a gift in a fun and creative way? This DIY gift wrapping tutorial makes wrapping a gift more fun. In this how-to, I’ll be teaching you four beautiful ways to wrap the perfect present for any occasion. Giving a gift is about bringing joy into people’s lives. Why not make it a gift they will never forget by starting with gift wrapping?
1. How To Wrap A Box With Wrapping Paper
Let’s start off with the basics. In my first how-to, I will teach you the correct way to wrap a box with wrapping paper. And I will also show you how to add some personal touches to bring your gift wrapping to the next level. This tutorial is perfect for every kind of celebration and it’s a must know for any social butterfly with a ton of birthday parties to attend.
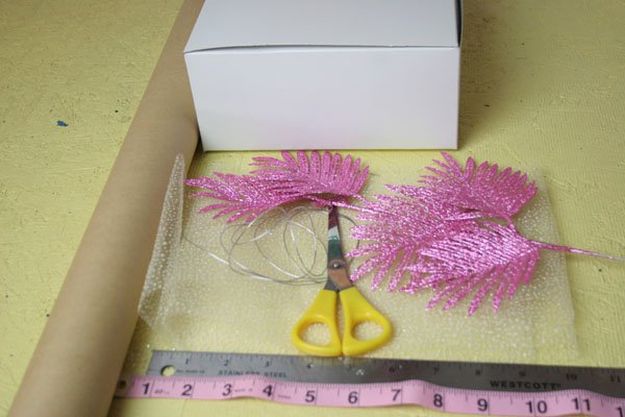
What You’ll Need:
- Wrapping paper
- Gift box (with your gift already inside)
- Scissors
- Tape
- Ruler
- Measuring Tape
- Decorative glitter leaves
- Decorative sheer accent paper
- Thin glitter ribbon
- Loose glitter
- Glitter glue
Directions:
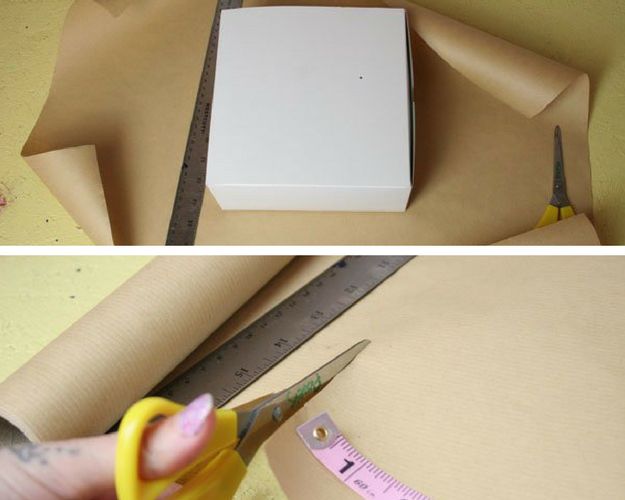
Step 1: Roll Out The Wrapping Paper
First, open the roll of the wrapping paper on your flat working area. Make sure there is enough wrapping paper to cover the whole gift. Get the measurement if needed, leaving a few extra inches just to be on the safe side!
Step 2: Place Your Gift
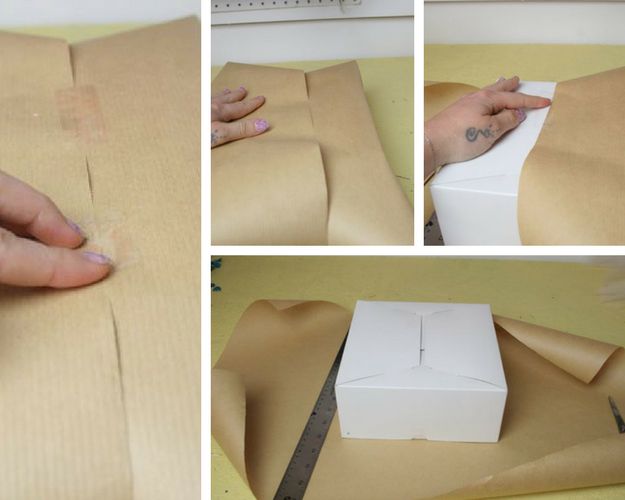
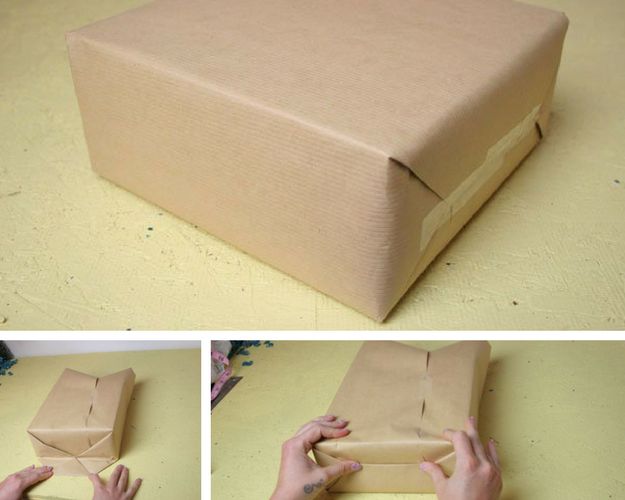
After your paper is cut to the exact size, place your gift facing down in the center of the paper. Bring your wrapping paper from the long side of the box, up to the center of your box. Gently pull the two sides so the paper embraces your package evenly, and close it with tape.
Step 3: Fold The Wrapping Paper
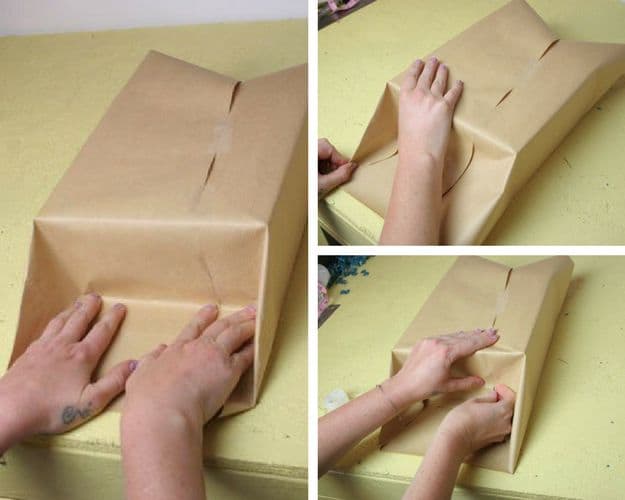
Next, face the open bottom towards you, then fold the right and left edges, pushing the sides in next to your box, to form flaps. Pull on all edges to make sure your folds are crisp, this is how you will achieve sharp packaging edges, think of it like folding origami.
Step 4: Fold In The Flaps
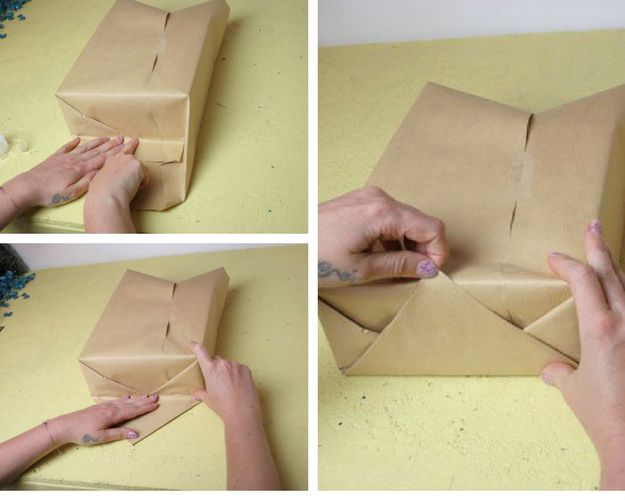
Next, fold in flaps inward towards the center. Again, making sure all folds are tight and crisp, taping down after every fold. When the flaps meet in the middle they should form a triangle. Fold triangle up towards the top of your box.
Step 5: Lay Triangle Flat And Fold
After creating your seam fold, lay triangle flat and fold the top of triangle inward to meet the base of your gift box, then tape closed. Repeat on both sides of your gift box.
Step 6: Add A Sheer Decorative Paper
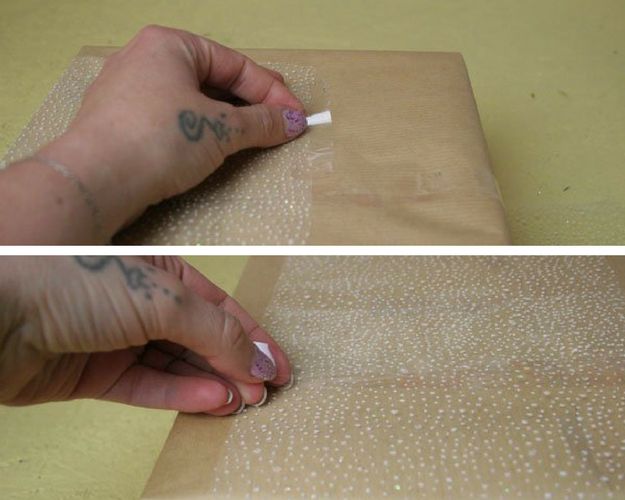
Now you have a perfectly wrapped gift, let’s add some more details to make this gift box a work of art! Measure the length on your box and cut a strip of paper leaving a 1 and 1/2 border in your gift box. Tape down one side of your sheer decorative paper to the bottom of your gift box, facing the side with folded edges. Wrap paper around package tightly and tape off the end on the bottom of your gift package.
Step 7: Wrap The Box With A Ribbon
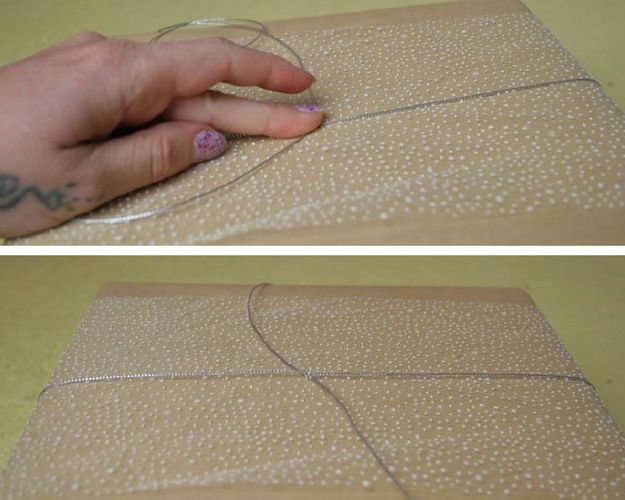
Next, flip box over so the top is facing you. Take a generous amount of ribbon and wrap over box over your sheer decorative paper. Tie a simple knot and don’t trim off extra ribbon just yet!
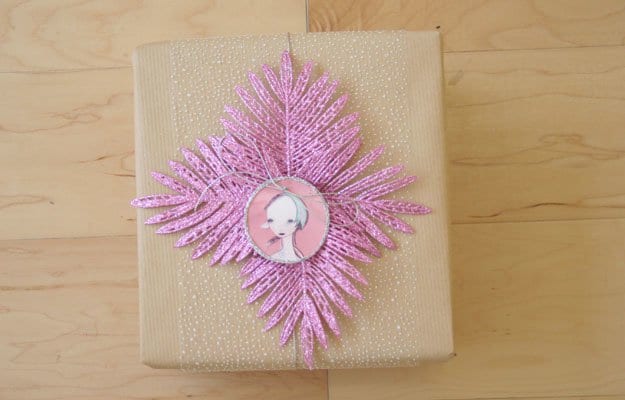
Step 8: Trim Glitter Leaves
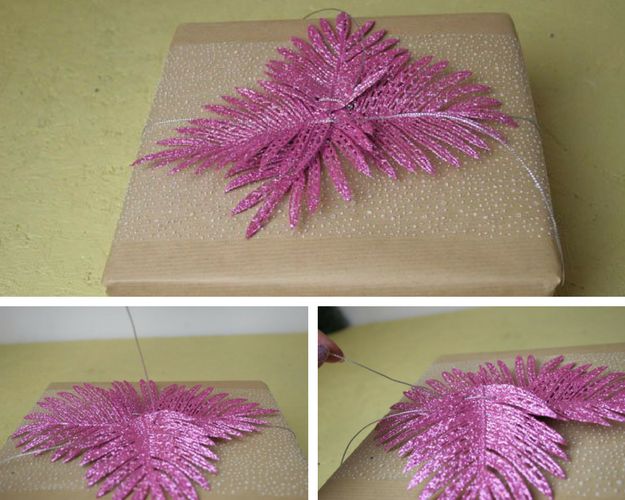
Trim glitter leaves and arrange the leaves however you wish on top of the package. Once satisfied with the placement, weave the ribbon through the leaves to secure it in place.
Step 9: Add A Unique Mini Tag
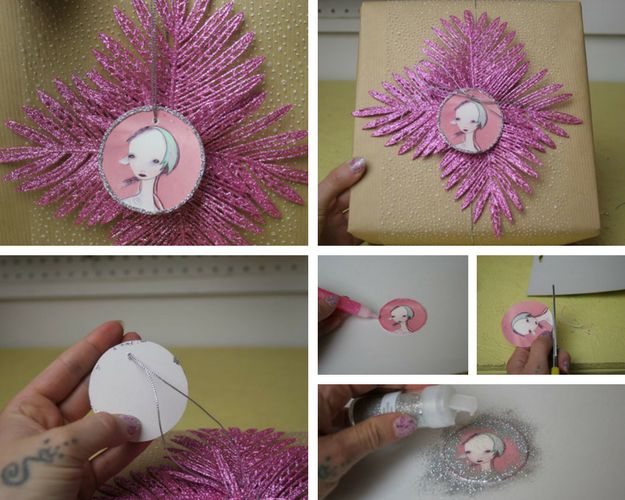
To top off our beautiful box, let’s add a unique mini tag. I took an original illustration and cut it into a circle. Don’t draw? You can use any image from a magazine or print out your favorite photo of you and the gift receiver. Next, we lined the edge with glitter glue and dusted loose glitter over. Shake excess and poke a small hole near the top of the circle (we used a sewing needle) and thread card through glitter ribbon and finish off the look with a bow. Now you have a one of a kind present sure to be a showstopper!
2. The 3-D Paper Present Bag
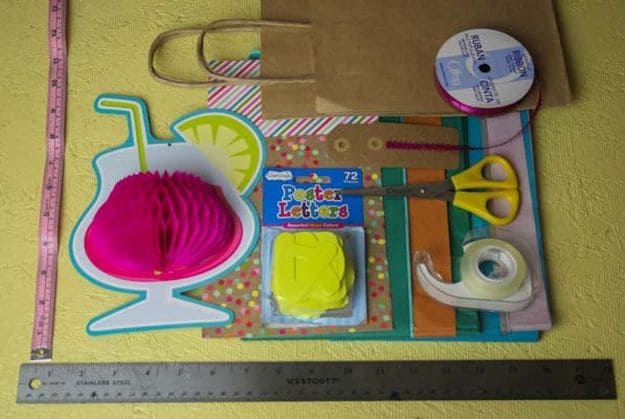
Next up, I will show you how to customize a plain paper bag with colors and 3-D elements. All it takes is a trip to your local dollar store and a bit of imagination! This fun gift wrapping idea is a perfect idea for gift bags for birthday parties or wrapping gifts of unusual size or shape.
What You’ll Need:
- Brown bags with handles
- Ribbon
- Scissors
- Brown gift tags
- Tissue paper
- Double sided tape
- Measuring tape
- Ruler
- Dollar store pink lemonade party decoration
- Poster letters
- Colorful patterned craft paper
Directions:
Step 1: Get The Measurement Of Your Bag
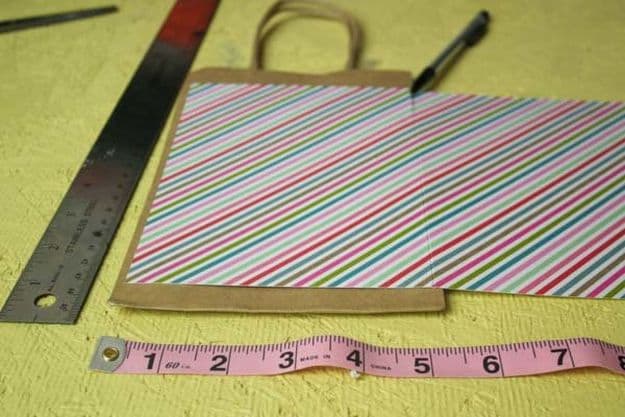
Now it is time to get started! Grab your ruler and let’s figure out how big your bag is so we can cut our patterned paper to attach to it. My bag is 8.5 x 5.25. Measure your paper to be slightly smaller than your bag. I measured mine at 5 x 8. Once measured, cut to size.
Step 2: Attach A Pretty Pattern Paper
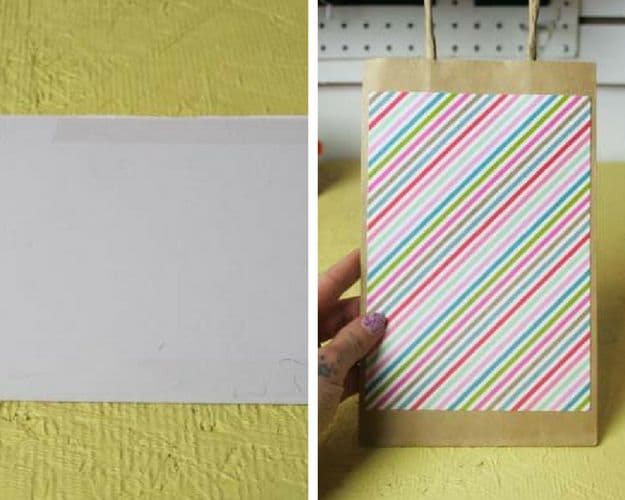
Time to attach a pretty pattern paper to our brown bag. Use double-sided tape on the back side of your paper, along with all sides. Then center your paper on the bag and press it down firmly.
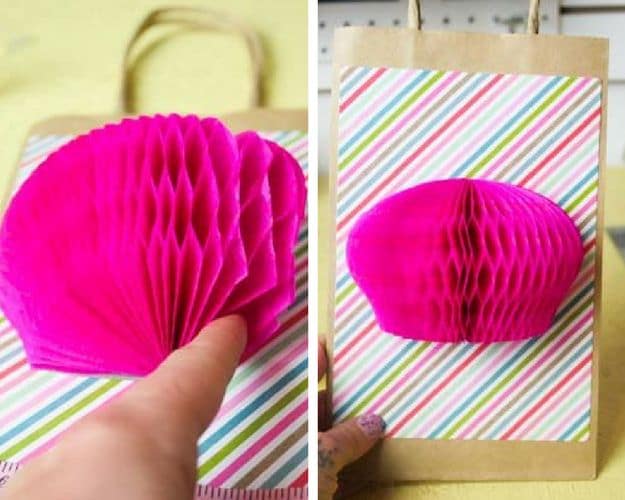
Step 3: Create The 3-D Element
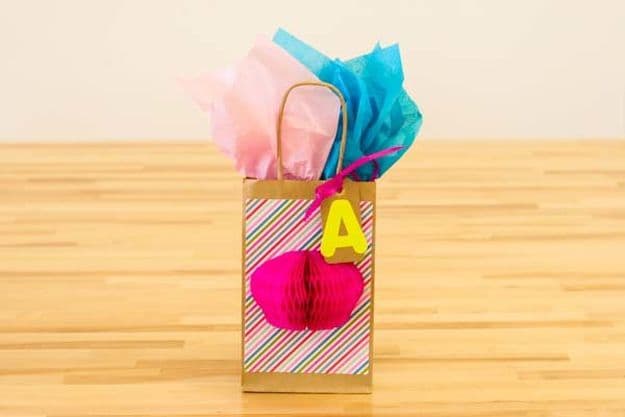
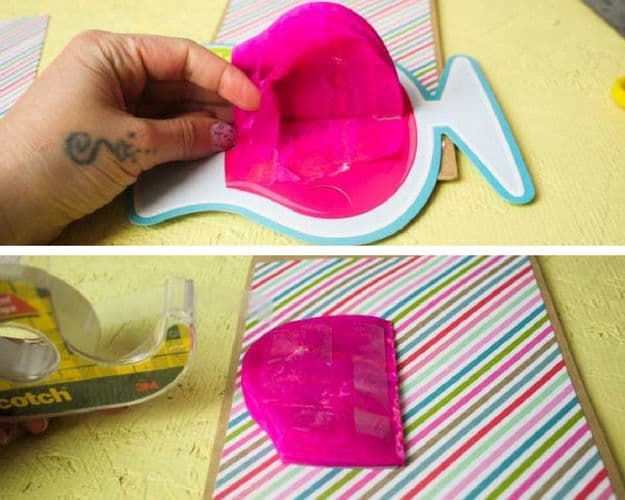
On my trip to the dollar store, I found drink decorations with 3-D paper elements. I want to use this 3-D paper as the centerpiece for our paper bag. Carefully remove the 3-D element from your cardboard decoration. Once removed, add double-sided tape to half of the back side of the element and attach to center of the pattern paper on your bag.
Step 4: Attach The 3-D Decor
Carefully open your paper to unfold the colorful 3-D element. Add double sided tape to the area where the element meets the patterned paper. Your bag is starting to come together!
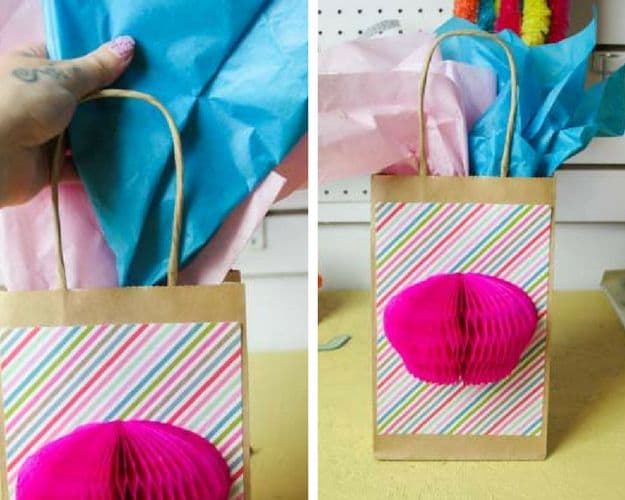
Step 5: Put Your Gift Inside The Bag
Insert your gift into the bag, then grab two different colored tissue paper and fold into a long triangle, place tissue paper next to each other for a neat color explosion effect!
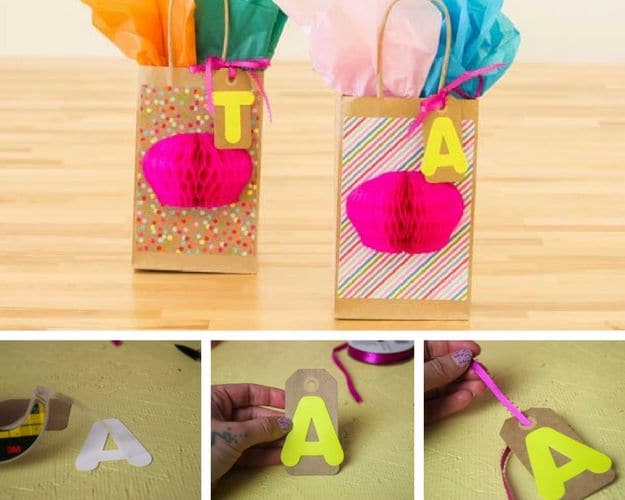
Step 6: Attach A Name Tag
Time to cap off your bag with a personal touch. Let’s make a name tag for the person receiving your awesome gift. Simply attach a paper letter to your plan label tag with double-sided tape and string some pretty ribbon to attach to your bag. All that is left now is to tie off the name tag and trim the edges, and you’ll have yourself a colorfully wrapped present sure to brighten anyone’s day!
Going to a wedding soon? Add a special touch to your wedding gift with this DIY idea! 😉 #DIYGifts https://t.co/5eAsuXOYIA
— DIY Projects (@DIYProjectsCom) September 4, 2017
3. Party Favor Gift Wrapping Project
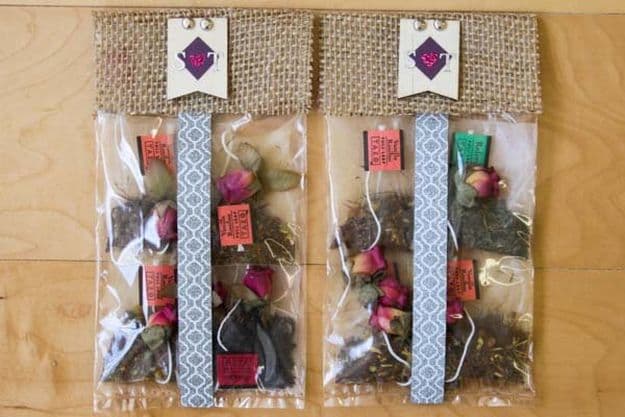
Want to thank your guests for attending a party you threw? This is the tutorial for you! We will teach you how to make the smallest of gifts look beautiful and thoughtful. Treat your guests to a smartly wrapped gift and they are sure to be the first in line for the next party you’ll throw. For this how-to, we packed some tea, but you could use any small gift for this wrapping idea.
What You’ll Need:
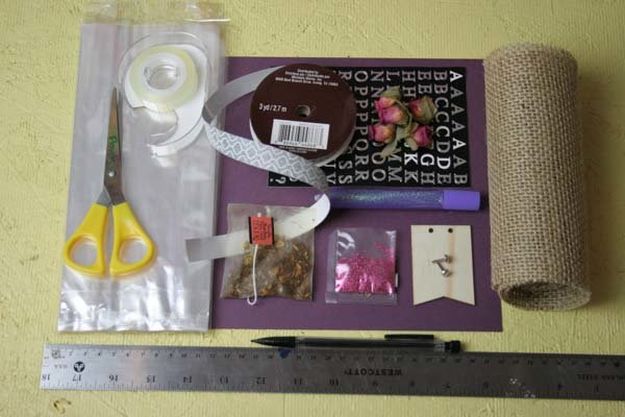
- Burlap
- Clear bags
- Double sided tape
- Sticker ribbon
- Small fake roses
- Sticker letters
- Scissors
- Glitter pens
- Glitter
- Pencil
- Wood tags
- Brads
- Ruler
- Tea
Directions:
Step 1: Attach A Decorative Tape To Your Bag
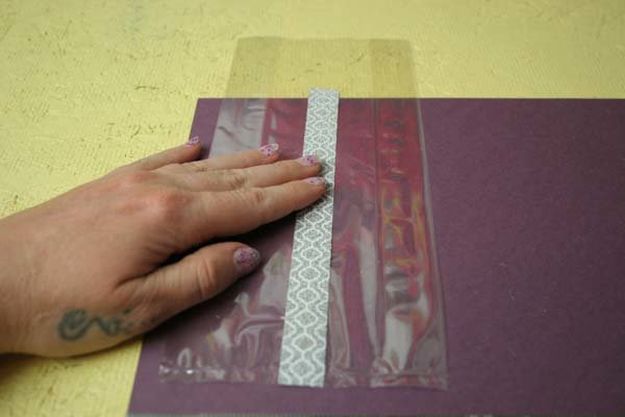
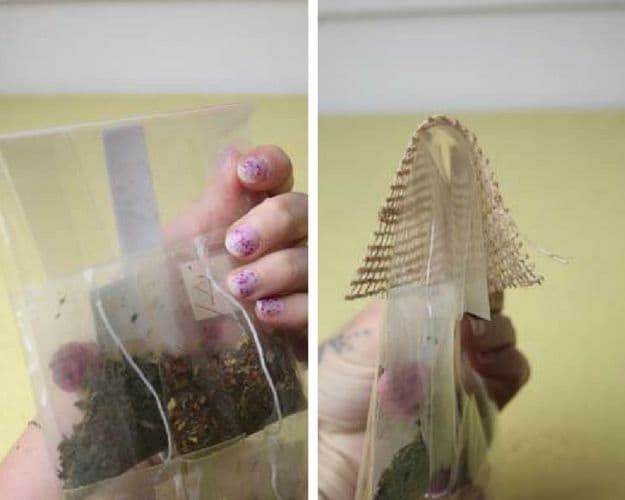
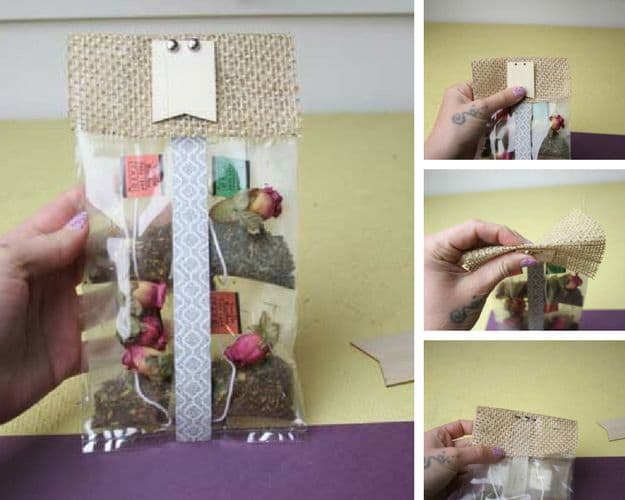
First, take your clear gift bag and attach your decorative tape to one side of your bag, down the middle. Leave 1 to 2 inches (depending on the size of your bag or bulk of your gift) at the top, since we will be folding the edge over.
Step 2: Secure Your Gift
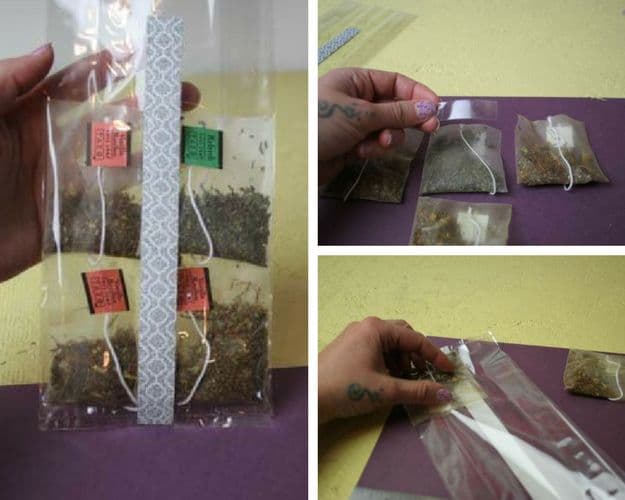
To prevent your gifts from bunching at the bottom of your bag, we will add double sided tape to keep them in place. Turn the tea bags face down and add about an inch of tape to the back of the tea bags. Next, take your bag and turn it face down with the opening towards you. Take a tea bag and start by placing it in the bottom left corner and secure with the tape, our bag was able to fit two rows of tea bags.
Step 3: Personalize
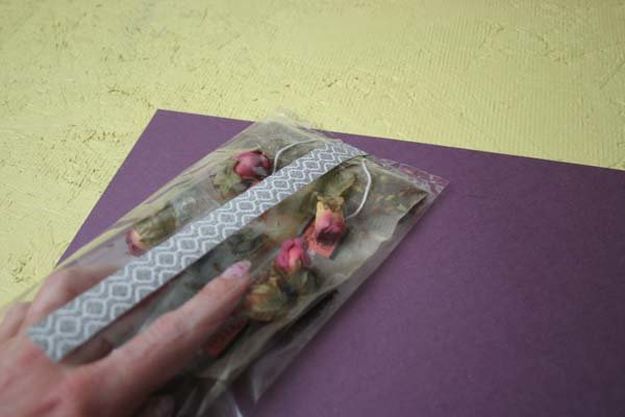
To add an extra special touch, let’s add some roses to our bag for color and style. You can also add loose candy like Hershey Kisses, pressed flowers, gemstones or chunky glitter! Space the roses out evenly over the tea bags, no tape needed for this step!
Step 4: Close Your Gift
Time to close our gift bag, fold bag to the edge of your decorative tape ends on the reverse side. Next, cut a square of burlap that will cover the fold made.
Step 5: Add A Name Tag
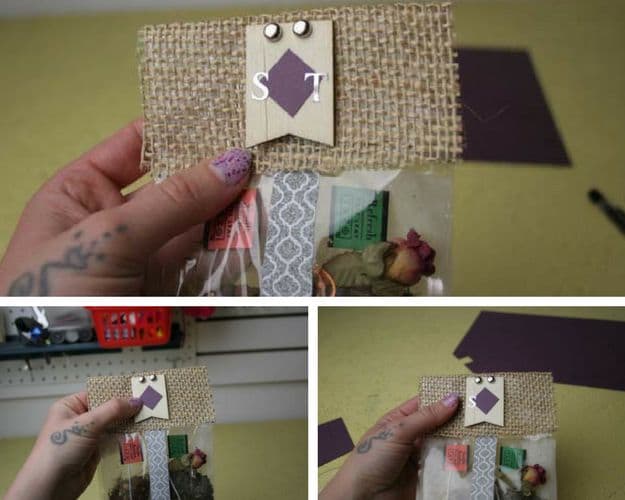
Next, let’s add the wooden name tag to secure the burlap and plastic bag shut. First, place wooden name tag in the center of your burlap, make sure to leave a quarter inch of space at the top for the brads to go through. Next, place brads through the wooden name-tag holes and secure on the backside of your bag.
Step 6: Spruce Up The Name Tag
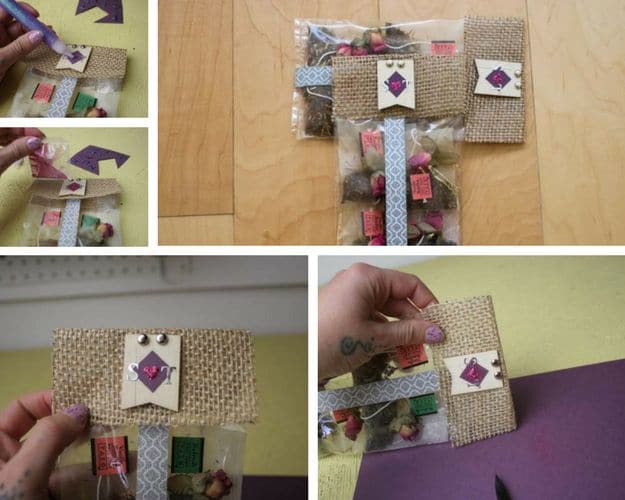
Let’s jazz up our plan wooden name tag by adding some colorful details! First, we cut out a tiny diamond shape from our colored craft paper and attached to our wooden name tag with double-sided tape. Next, we added sticker letter initials on either side of our diamond, for a personal touch!
Step 7: Shake It Off
You know what our name tag needs? Some glitter. Take a glitter pen and draw a tiny shape in the center of your diamond, then cover with loose glitter for a multi-dimensional touch. All that is left now is to shake off the loose glitter and it’s time to start giving out these beautifully designed gifts bags!
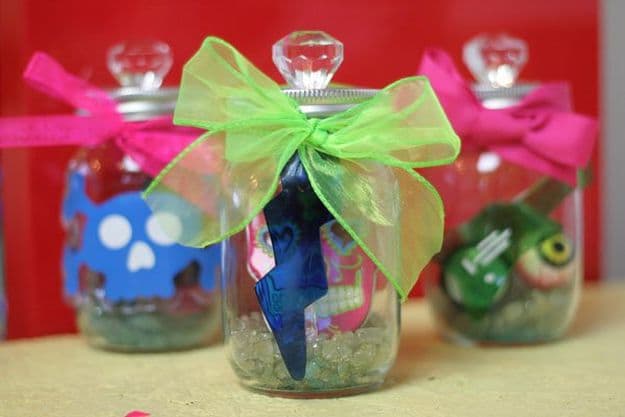
4. The Mason Jar Gift Box
With this how-to, the gift isn’t just what’s inside, it’s the jar itself! Perfect for fans of upcycling or as a housewarming gift, this recyclable container can be used for just about any craft making project, or as rustic drinking glass. This quick, easy, and cheap gift wrapping idea is perfect any last minute party or event.
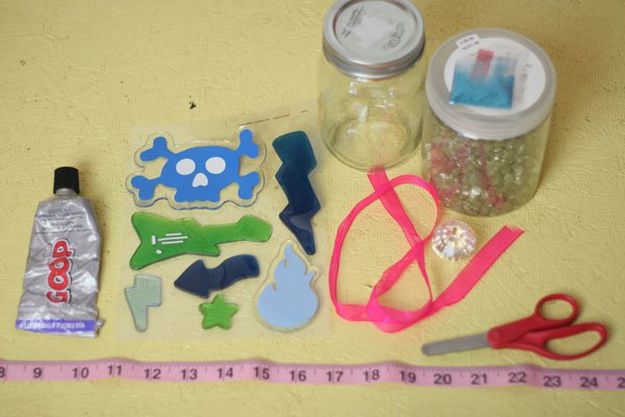
What You’ll Need:
- Mason jar
- Craft rocks
- Loose Glitter
- Thick Ribbon
- E3600 glue
- Plastic gems or toys
- Scissors
- Removable gel window stickers
Directions:
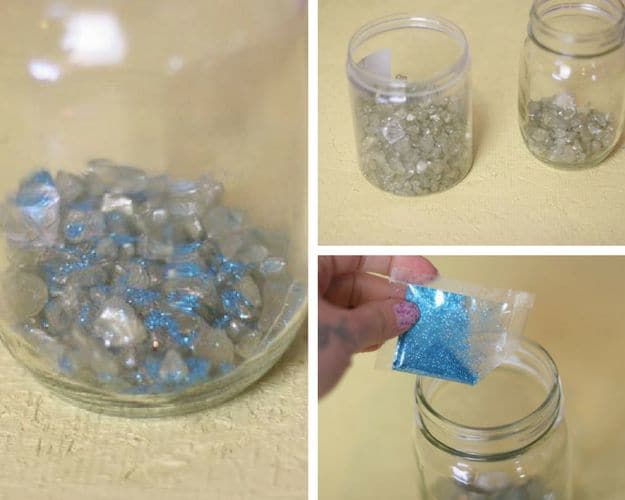
Step 1: Create A Colorful Base
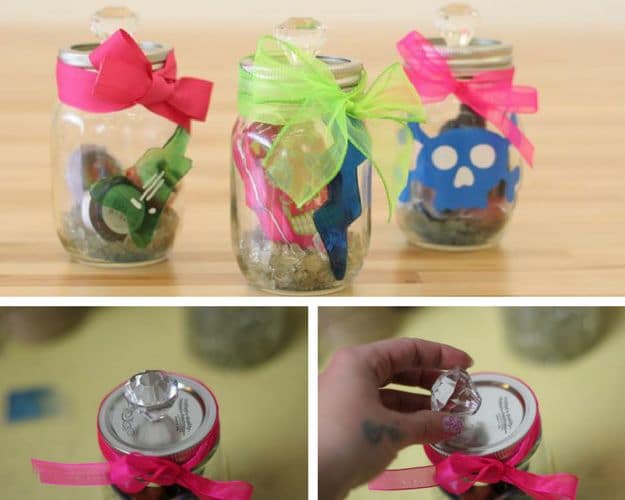
Create a colorful base for your mini gifts to sit on by adding craft rocks and glitter to your mason jar.
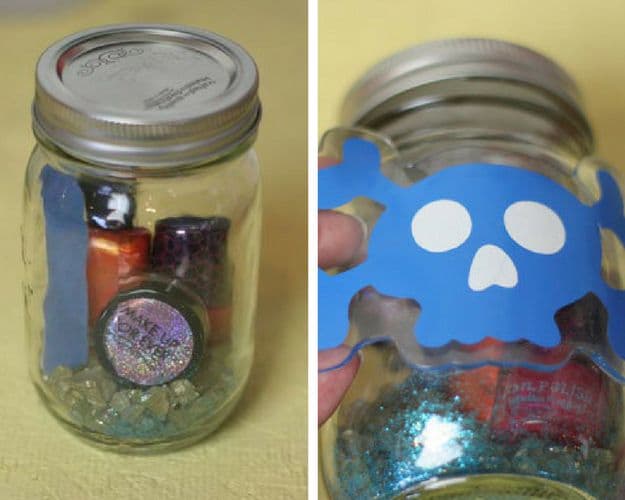
Step 2: Put Your Goodies Inside The Mason Jar
Next, add in your goodies and screw back on the mason jar lid. Next, add a pop of color by adding a removable gel window sticker to the side of your jar you want to be the front.
Step 3: Wrap The Lid
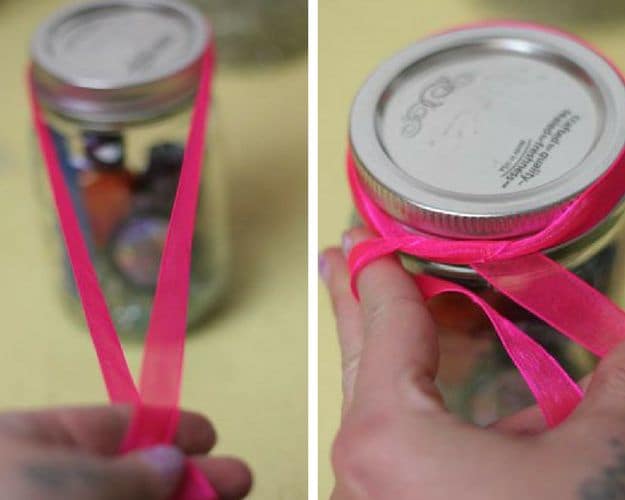
Next, wrap a contrasting colored ribbon around the lid of your jar and tie off in a bow.
Step 4: Add A Fab Handle To The Lid
Top off this look by adding a fancy handle to the lid of your mason jar. We used some plastic crystals, but small toys would also look great, use your imagination here! Attach topper with E3600 glue. Allow glue dry time, and then you are ready for any type of party with this fun and uniquely wrapped gift!
Want more gift wrapping ideas? Check out this video from Olip Beauty:
Gift wrapping is just a simple way to add some flair and personal touch to your gift, making it even more special. No matter how you do it, what is important is the thought of making a gift best describes your recipient.
Which of these gift wrapping ideas is your favorite? Let us know in the comments section below.
Up Next: 60 Cute and Easy DIY Gifts in a Jar
Stay connected with us on Facebook, Twitter, Pinterest, and Instagram!
Editor’s Note – This post was originally published on June 2014 and has been updated for quality and relevancy.
I’m Manas Ranjan Sahoo: Founder of “Webtirety Software”. I’m a Full-time Software Professional and an aspiring entrepreneur, dedicated to growing this platform as large as possible. I love to Write Blogs on Software, Mobile applications, Web Technology, eCommerce, SEO, and about My experience with Life.

